Jess came up with this fabulous idea and kicked us off last week, so make sure to read her post! Today is my day to tell you all about my deep dark secrets...
Hi, my name is Rebecca, and I once fed my little sister ice cream for dinner for 3 days in a row when I was in high school and my parents went out of town. Oh, not those secrets? Alright.
Confession: I've been sewing and quilting seriously for almost a year and a half and I haven't been sewing with an accurate 1/4" seam allowance this entire time.
I KNOW. I'm disgusting. I agree. But I'm here to save you from my fate.
Let's start by why an accurate 1/4" seam is important. I taught myself to quilt pretty much by trial and error and reading sewing blogs. They all talked about this seam allowance [side note: who decided it would be 1/4" in the quilting world?...that person must feel so smug all the time ha] so I just tucked it away as a fact.
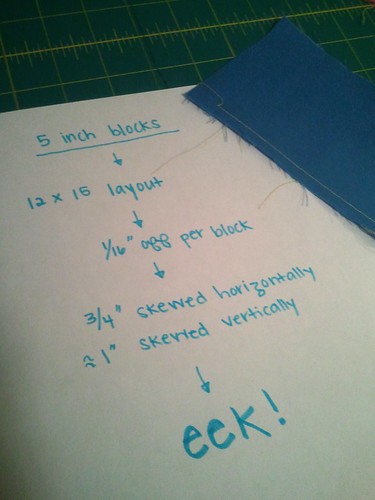
Let's imagine that you're following a quilt pattern, and you cut out all your fabrics listed all at once, and then you start sewing. Many people do this since it's quite a time saver. Our hypothetical quilt uses 5.5" unfinished blocks, and they should therefore finish at 5". We're using a layout of 12 blocks by 15 blocks for a 60"x75" quilt...a generous lap size.
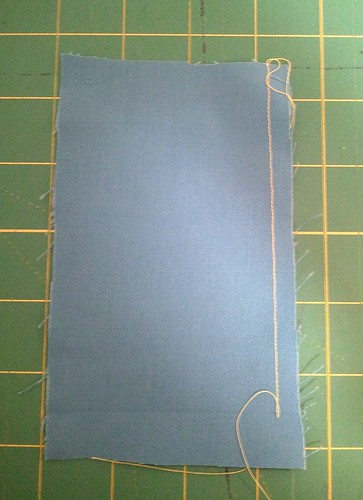
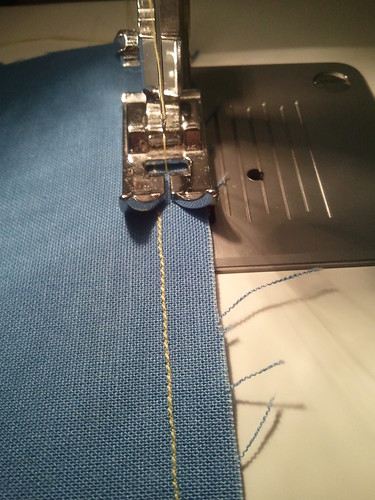
Imagine that this single piece of fabric is two blocks that I'm sewing together. I lined the edge of the fabric up with the edge of my presser foot, which is what I always do.
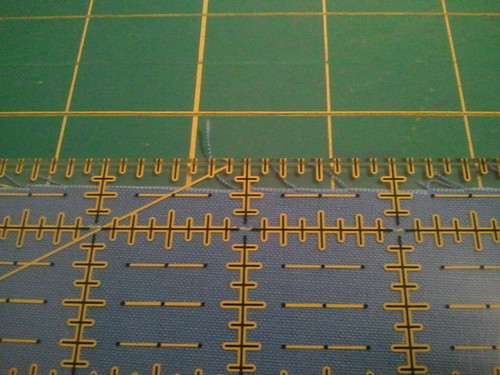
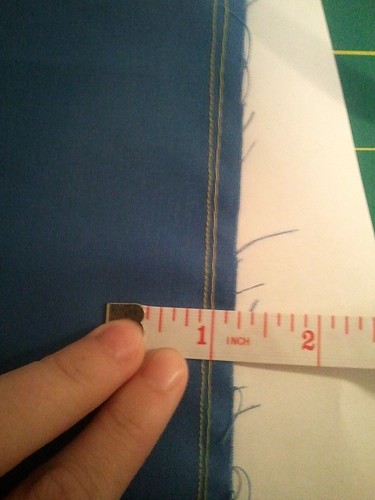
Aside from the horrific nighttime photo it looks great right? WRONG. When I went to measure the seam allowance, it's about 1/16" beyond the 1/4" mark. Big deal, right? That's not even a mark on the ruler, so it must be an inconsequential difference.
Wrong again! By the time we reach the end of 12 blocks, we'll be 3/4" skewed horizontally, and even more skewed vertically. Ok, so your quilt is going to be an inch smaller, pfft. The real upset here is that your blocks will be skewed from where they're supposed to actually be in the pattern, so they might not line up with other blocks. And let me tell you, there is nothing more tragic than cranking out 300 HSTs, trimming them, sewing them together, and then realizing that your rows don't line up.
Take, for instance, my 1st Mustache Mini. Now, some of the fiddlyness is a result of poor cutting, which Jess wrote about last week, but much of it was also the fact that I've been sewing with an incorrect seam allowance. I made this "pattern" up on my own. I stitched up the mustache and then cut it to a size that I thought looked nice. That middle piece measured 6" square. So I said to myself, that's 6 one inch squares on each side. It would be 6 squares if I had an accurate 1/4" seam allowance. You can see at the corners that I had to stretch and pull to make the rows line up, and it didn't work at every corner. You can also see that my horizontal line above the cross-stitched center is totally not a straight line because of all the fudging I had to do. Good times...
Now, if you're like me then you almost never use a pattern when quilting. As a general rule if I'm making my own stuff up then I can get by just fine with my slightly-off measurements, if I make sure to not cut everything out at once and just kind of take it as I go along. It's sort of haphazard sewing and I know that most people would go crazy with that method.
So how can you fix an inaccurate seam allowance?
First of all, sew a line down a piece of fabric, like I did above, and measure so that you know what you're working with.
You could always get a quarter-inch foot, which is pretty popular among quilters. Confession: I'd rather buy fabric than notions. So I took a different approach:
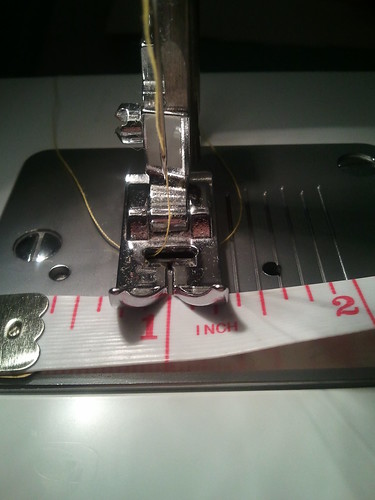
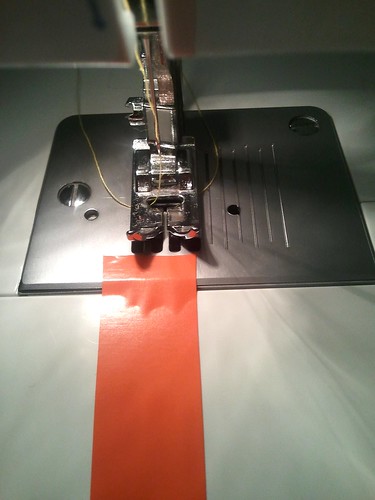
Use a flexible measuring device such as a dressmaker's tape measure or regular tape measure, not a ruler. Place it under your presser foot where the needle will be hitting, and line it up with an inch mark. Mark where 1/4" is.
I used to use washi tape to mark my machine when sewing, but now I use electrical tape because it stays put a little better.
Then sew another line and use the marking to line up the raw edge of your fabric. Measure again. Ideally you want a "scant 1/4" seam, which means that your stitch line will be just inside the line marking 1/4" on the ruler. This allows for a little wiggle room due to the bulk of the seam when it is pressed.
So spend a little time before your next sewing session figuring out what your machine is actually sewing! It's the little things in your work that will start to make all the difference :)
We have lots more awesome stuff ahead every Friday in November to inspire you to challenge yourself, sewing-wise [even if you're like me and only sewing in the dark because you don't get home from work before 6:30]:
Kickoff: Friday, Nov. 2: Jess at Quilty Habit - Accurate Rotary Cutting
Nov. 9: Rebecca at Sew Festive Handmade - The 1/4 Inch Seam
Nov. 16: Val at PinkPlease! - Ruffles
Nov. 23: Rachel at Let's Begin Sewing... - English Paper Piecing
Nov. 30: DOUBLE POST: Katie at Swim, Bike, Quilt - Sewing with Knits
Kristina at Ornamental Confectionary - Making Pants
*AND link up at Quilty Habit with your own Sewing Confrontation!



This is great! I'm actually going to mark my machine next time I sew (which will also likely be in the dark haha, go us twenty-somethings). You did your research and it shows! I can't tell you how many times I've fudged it too, lol.
ReplyDeleteThank you for your tip. I am going to mark my PFAFF and use your tip. Again, thank you for sharing...Judith, Texas
ReplyDeletePS: I had not idea that the foot was not an accurate 1/4". I just took for granted or just did not think. (SR. Moment) Now I do. LOL Judith, Texas
ReplyDeleteI need to tape my machine - my 1/4" foot is scantily more than 1/4" and even if I move my needle it's still not as scant as I want!
ReplyDeleteHmm. I didn't realize a 1/4" foot can be inaccurate. I will have to measure mine when I get home.
ReplyDeleteA great read, Rebecca, thank you!
ReplyDeleteUsing tape to mark you seam is a good idea but it's better to use a quilting ruler to find you 1/4" mark. Tape measures can vary a lot. I have two that by 24" one is off by 3/8". I've taught finding an accurate 1/4" to many beginner students. The best way to find it is to cut 3 equal width strips about 6" long, sew them together side by side. Press the seams away from the middle and measure the center strip. It should be exactly 1/2" smaller than the cut size. If it isn't try again.
ReplyDeleteQuilty Habit sent me to your blog...I love my 1/4" foot and having the ability to move my needle to the right to achieve a scant 1/4" seam. I also use a piece of tape down on the body of my machine to butt my fabric against to help me keep my seams straight and 1/4"! Sewing a 1/4" seam and cutting properly are the most difficult things for me...maybe I should slow down!!!
ReplyDelete