Showing posts with label Christmas. Show all posts

Wednesday, August 22, 2012

Kittens and quilting do not mix


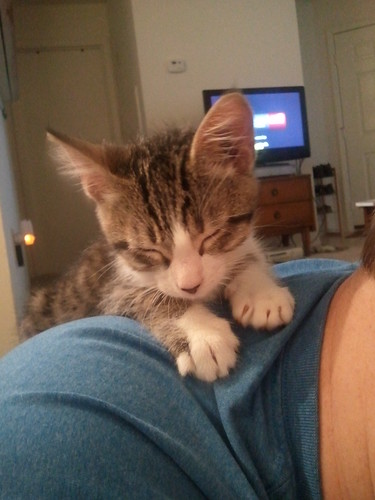
So I've had a kitten [which we named Ares, kitten of war!] for just about 24 hours.

It's hard to sit on the couch and read blogs when your kitten wants to play. All.the.time.


Even harder is figuring out when I'm going to sew! We took him in the sewing/airsoft room and let him wander around yesterday, but there's so many small things and spaces he can climb into that we keep the door closed for now until he mellows out.

I'm not sure that I can sew and keep an eye on where he's wandering to in the room [those of you who sew with tiny children underfoot are clearly amazing].


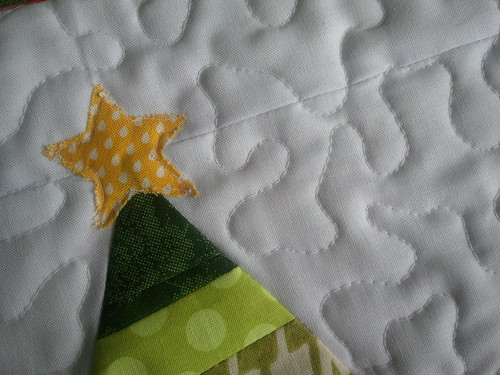
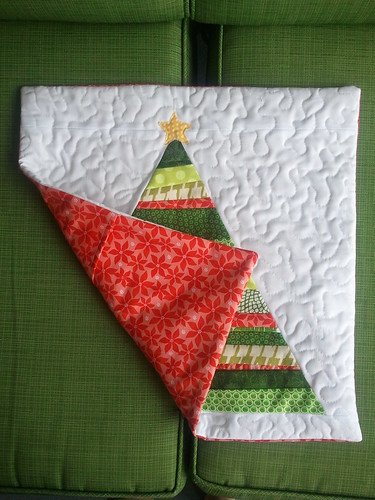
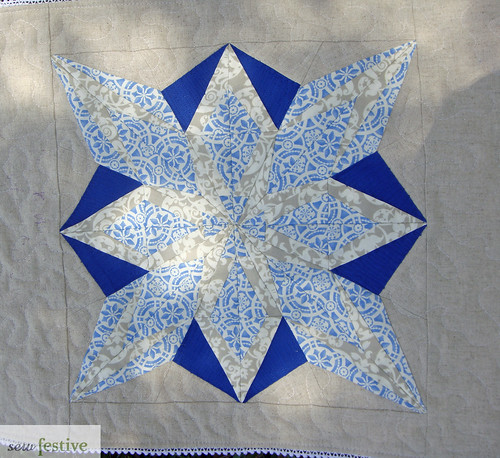
I managed to piece this pillow top on Monday night since I figured I'd be too busy on Tuesday after picking Ares up at the vet. I woke up early this morning to sneak into the sewing room to quilt and finish it with an envelope closure. I would work for 10-15 minutes and then go play with Ares. It took a little bit longer to finish that way, but then I didn't feel bad for not giving him enough interaction.


This pillow cover is destined for The Sewing Studio, which is the store I teach at, for a class in September. It's based off the pillow by Kati over at From the Blue Chair, although I don't use her tutorial whenever I make one. And mine is not paper pieced, because that just seems to make things a little more complicated than needed.


I also like my original version [above] better, so apparently I'm more a fan of a skinny tree?

I'd like to get a bunch of DWR arcs sewn up today, because Jennifer is making me look super bad with all her progress. I cannot find my 8 arcs after we did a huge cleaning and kitten-proofed the apartment...I'm a little concerned Stephen might have thrown them out, thinking they were some sort of scrap project with the paper still on the back of them. Eeek!

Here's to hoping the kitten allows it!

Wednesday, August 15, 2012

Winterkist Blog Hop - Gnoma Advent Calendar


When Katie asked if I wanted to be part of the Winterkist blog hop I said yes in about 0.2 seconds. And then in about 0.5 seconds I knew what I was going to make.

Even though I knew what I was going to make, I wanted to ensure that anything with Winterkist was made in the epically fun spirit of its designer. So I thought to myself: WWMSSD? That's What Would Monica Solorio-Snow Do? for those of you who are behind the times :) Monica's a pretty fun and hilarious lady, so I tried to rise to her level - this is me channeling my inner Monica.

I gathered myself a gnoma and we set out into the world, Flat Stanley style. I took the Prince Harry of gnomas, because he's not directly next in line for the throne, so he's allowed to engage in shenanigans and go out and rabble-rouse, whereas poor Prince William gnoma had to sit at home waiting for his moment to shine in the project. What did Prince Harry Gnoma and I do on our day of fun? Take a look:

1. Buckle up, Gnoma, safety first! 2. We had to get gas, and he pumped it [it builds character] 3. He was thirsty, so we had to stop for a Coke 4. Prince Harry Gnoma's favorite artists are ABBA, Tracy Chapman, and Tenacious D, in no particular order 5. Kelly and I buried him in the sand at the beach 6. I told you Prince Harry Gnoma was all about the shenanigans...wonder where he got all that cash money?! 7. Went hiking and had a zen moment at the top 8. Practiced the art of seduction with a mustache

By the end of the day, we were tired, but ready to get to work!

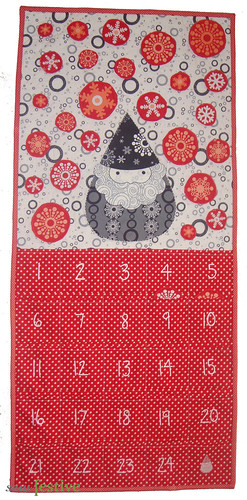
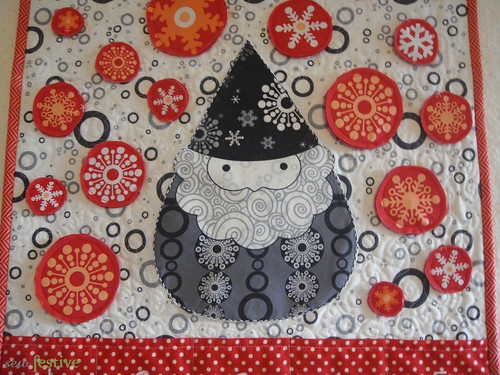
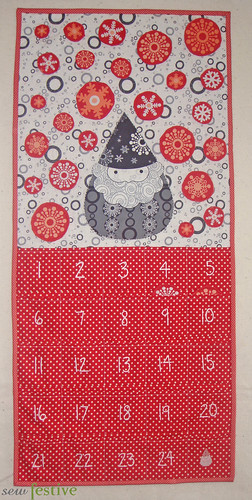
A Winterkist advent calendar! When I was growing up we had a Christmas tree advent calendar and you hung an ornament up for every day. I loved doing that [still do] and so I really wanted to be able to physically move something for each day to countdown to Christmas.

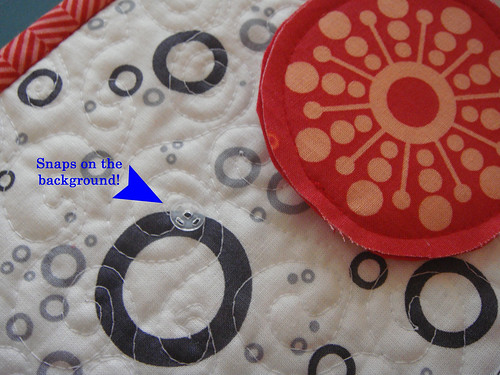
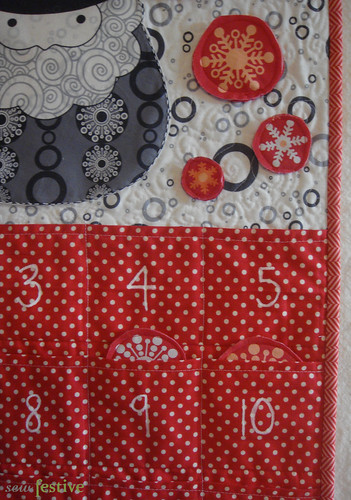
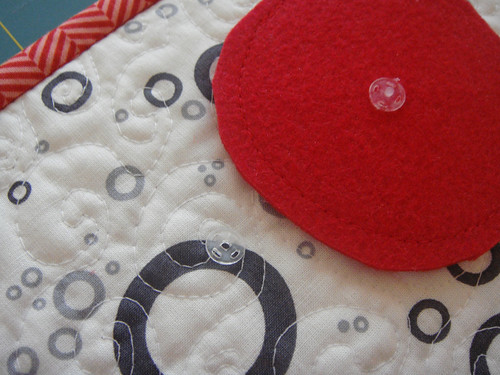
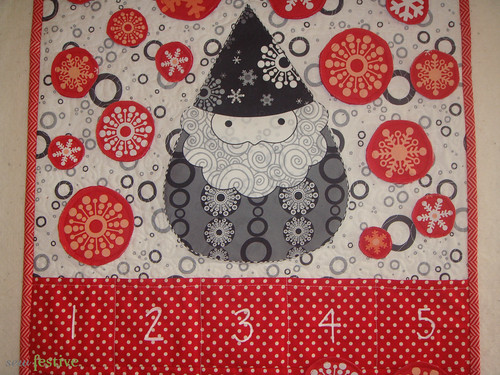
So to count down each day closer to Christmas you get to take a snowflake from the pocket [the snowflakes slide in more, I just wanted them to be seen for the picture] and snap it up around Prince William Gnoma. The snaps that are on the calendar itself are very hard to see since they're clear, so when none of the snowflakes are snapped on then it still looks great!


I Steam-a-Seamed the largest gnoma in the collection to the background and then stitched in DMC Perle 8 around the edges. The only thing I'd do differently next time is layer some white fabric behind the gnoma so you can't see the background when it's stitched down. I kind of think it looks like freckles?


The snowflakes are interfaced and then stitched to some heavy duty red felt for durability.


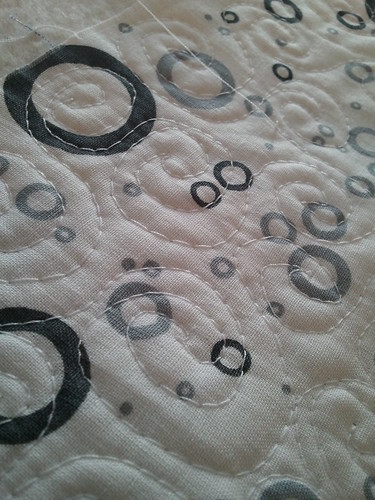
The white background [which is also Winterkist] is free-motion quilted in a new-to-me design. Swirls! Hopefully so it looks windy/snowy/blustery. I don't have the patience for practice, so this was my first try at this design, and I'm pretty darned pleased.

Winterkist pairs up so nicely with this red Farm Fresh dot for the pockets, and the Riley Blake [I forget the line] for binding, and some fabric marker drawn numbers to indicate the day. In all honesty, I'd originally planned to embroider the numbers, but wanted nothing to do with more hand-work when I was sewing this all together.

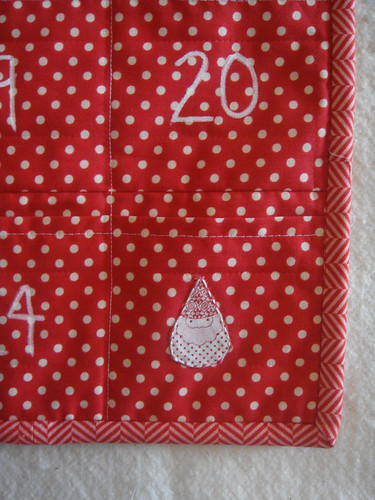
AND LOOK. Baby gnoma! From Holiday Happy! For the 25th :)


I love it! I love that it's on the bigger side [about 18" by almost 36"] so it will take a commanding space in my living room this winter. And I love that it's not "Christmassy" and so I can leave it up in January and February and June. The pockets are plenty big enough [3.5" square] to hold the snowflakes and even a little treat or note.

I plan to sew some snaps onto some double fold binding or some ribbon so that I can use the snowflakes as a garland in January if I want. You could totally do that with the gnoma too, I just didn't think of it until I had already sewn him down.

Thanks Katie for letting me join the fun, and for Monica for having gnoma fun with fabric!

Don't forget that if you leave a comment on this post, or any other blog hop post this week, that you get entered to win a FQ bundle of your choice from The Fat Quarter Shop!

The remaining blog stops:

Aug 16  Diane at from blank pages
Aug 17  Allegory at {sew} Allegorical

Aug 20  Kim at My Go-Go Life
Aug 22 Jennifer at Ellison Lane Quilts
Aug 23 Jenelle at Echinops & Aster
Aug 24  Katie at There & Back


Tuesday, July 24, 2012

Christmas in July Tutorial Wrap-Up


Christmas in July tutorials are all finished. Sad. But how great were all those projects?! It makes me want to keep sewing for the holidays! It also amazes me that all these wonderful ladies came up with such different tutorials...a great variety of projects!
And make sure you go visit all their blogs because they're constantly producing awesome stuff :)

I wanted to make sure to do a round-up of all the tutorials, so you can access them in one easy location.

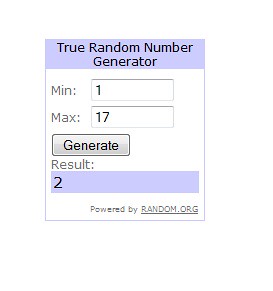
But first things first, the winner of the Thimble Blossoms PDF Stocking Pattern is:
...which is Judith! She makes different stockings every year! I'll be emailing you Judith :)

I will also be updating the Christmas in July tab at the top of my blog later tonight with links to all of the tutorial posts, so you can easily access which one you want to make!

Remember, the linky party opens next Monday July 30th and will remain open until Friday August 3rd. There will be multiple categories, but you can only link one official entry per category for prize purposes. There's one prize per category, plus a prize for a random winner out of all the people who choose to share projects! Your project must be a completed item to be considered a valid entry!

So you still have plenty of time to make some holiday items for a chance to win some fabric :)

Maybe one of the tutorials from the past month?...


Monday, July 16, 2012

Christmas in July - Stacking Gifts Wall Hanging


This afternoon's Christmas in July post is brought to you by Kelsey. She just finished up this bright bit of quilting, and I love love love her On a Whim quilt. She was also part of the Let's Get Acquainted Blog Hop, and wrote up a great tutorial on how to upcycle dress shirts into a dish mat, which is so useful [I love useful sewing, it makes Stephen less grumpy about thread all over the house!]
________________________________________________________________________

Hi Everyone!  Are you feeling festive?!  I’m Kelsey from Kelsey Sews and when Rebecca asked me to join the Christmas in July event I was so excited!  I’ve had the idea for this wall hanging bouncing around in my head for a while and this was the perfect chance to make it happen.

Stacking Gifts Wall Hanging

Materials:
  • White (or other neutral background/sashing fabric) – 1/4 Yard
      Cut into 3 strips 2.5” x WOF, then subcut as follows:
      • 2 Strips 32.5" x 2.5”  *I left mine 2.5" x WOF and trimmed after attaching*
      • 3 Pieces 4” x 2.5”
      • 3 Pieces 2.75” x 2.5"
  • Prints – There are three gifts which you can choose to make from one, two or three prints.  This fabric is the “wrapping” on the gifts.  I used two prints for my sample in the pictures.  I won’t quote yardage since it depends on your choice (and you don’t need much!) but you’ll need the following pieces for each gift block
    • 2 Pieces 6.5” x 3.75”
  • Coordinating Print (or Solid) – This will be for the ribbon & bow of the gifts.  You will need 1 Fat Quarter or 1/8 Yard.  Cut into the following pieces:
    • 3 Pieces 6.5” x 2”
    • 6 Pieces 2.5” x 2.5”
  • Backing – 1/2 Yard or a piece approximately 35 x 15 (allows for overages when basting)
  • Binding – 1/4 Yard or 100 inches of 2.5” strips

* I used 1 Fat Quarter for my solid pieces as well as my binding and I had exactly enough, so that’s an option*
Fabric Pieces

Instructions:
**All seams are a scant 1/4” and all seams are pressed open**

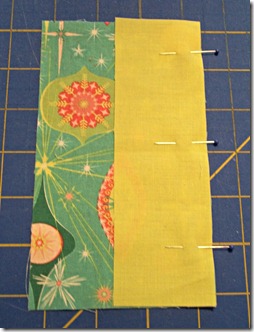
1. First we will make the body of the gift.  You’ll need your print pieces and the 6.5” x 2.5” piece of your coordinating print/solid.  Pin the 6.5” side of the thin strip, right sides together, to the 6.5” right hand side of one of the print pieces.  

Step #1

2. Sew and press seams open.  Attach the second print piece to the other side of the thin strip.  You will end up with a piece that looks like this: 

Step #2

3. Next we’ll make the bow for the top.  You’ll need:
      • 2 of the 2.5” x 2.5” pieces of your coordinating print/solid
      • 1 of the 4” x 2.5” pieces of white/background
      • 2 of the 2.5” x 2.75” pieces of white/background
Start by drawing a diagonal line across the back of each of the 2.5” x 2.5” squares. 


4. Take one square and match it, right sides together, to one side of the 4” x 2.5” piece.  Pin, and sew on the line you’ve drawn.


5. Then, using your ruler & rotary cutter trim the outer corner off, 1/4” out from your sewn line.  Press seam open. 


6. Once you’ve pressed the seam open you can place the other square on the other side (opposite edge of where you just attached to) and pin.


7. Sew on the line, trim and press.  This will resemble a flying geese piece but the point is more than 1/4” away from the edge.  It should look this way – you didn’t mess up!


 8. Now attach the 2.75”x 2.5” white pieces to each side of the bow you made in step #2, matching the 2.5” sides together.  You should now have a strip 2.5” x 8.5” (trim if necessary).


9. Attach the bow to the top of the gift so that the point of the white triangle is closest to the gift.  Your block should look like this:


10. Repeat steps #1-9 to make the remaining two blocks

11. Once you’ve made all three blocks we’ll need to sash them together.  I didn’t take any pictures of this but here’s how I did mine.
  1. Lay your blocks in the order you want them.  Top, Middle and Bottom. 
  2. For the top block take 2 of the 2.5” x 8.5” white strips.  Attach one to the top and bottom of the block
  3. Then attach the middle block to the sashing strip on the bottom of the top block
  4. Next add an 8.5" x 2.5"  sashing strip to the bottom of the middle block
  5. Add the top of the bottom block to the sashing strip on the bottom of the middle block
  6. Finish by adding an 8.5" x 2.5" sashing strip to the bottom of the bottom block
*A Tip – I cut my strips longer than 8.5” (probably closer to 10), attach them all, and then trim down the whole side at once.

12. Now that the blocks are all sashed together into one long strip you can add the 32.5” x 2.5” strips to each side. Use the same tip as above if you’d like.


Yay!  A finished wall hanging top.  Now you can baste, quilt and bind however you’d like.  I quilted mine with some all over loops and used the same solid as my ribbon/bows for the binding. 

When attaching the binding you may want to add a sleeve or some tabs so you can hang your project.


I used this excellent tutorial to make little corner pockets on mine.

I hope you make one of these this year!  They’d make a great gift (or a present for yourself!).  You can adjust the pattern to suit your needs as well.  Make a few more gift blocks to increase the length, make one block and turn it into a potholder, or sash the blocks together along their sides and turn it into a table runner.

Merry Christmas & Happy Holidays!!
Kelsey 
______________________________________________________________________________________________

So, so, so cute! And I love the retro fabric! I think I'll make one and have the presents running horizontally and hang it over my couch. How adorable would it be to make the presents as individual blocks and sew them into reusable gift bags? Get it, a present on the outside and a present on the inside? I kill myself sometimes.

Thank you so much Kelsey, this is a fabulous project that I'm sure many people are adding to their to-do lists!

 We only have one Monday left of tutorials, and 2 weeks until the linky opens up for you to show off your holiday sewing! For a little extra incentive, today's giveaway is a quick project that you can totally finish in 2 weeks:


The winner will receive one PDF copy of the Thimble Blossoms stocking pattern pictured above. Awesome! I had a handmade cross-stitched stocking growing up and loved it, so make your family some stockings of their own!


Requirements to enter:
  • You have until 12 pm EST on Monday July 23rd to enter. I will announce the winner on Tuesday the 24th.
  • This giveaway is open to anyone, anywhere
  • You must have a valid email address, and if it's not listed in your profile then it must be listed in your comment
So how about this time you tell us the best present you've given or received. Good luck!


Christmas in July - Fussy Cut Pillow


Good morning all! First up for today's Christmas in July tutorials is Bianca. It seems like this lady never takes a break - she's run a Retro Flowers QAL and a Patchwork Prism QAL in the last several months! They're both over, but go take a look at the posts if you're looking for inspiration/courage to make quilts with non-square shapes.
__________________________________________________________________________________
Hi! I'm Bianca from Sweet Diesel Designs and I am thrilled to be participating in Rebecca's Christmas in July. Isn't it so hard to believe that the holidays will be amongst us in just a few short months?! Shortly after Rebecca asked if I would make a little something, I got a nice "treat" in the mail and inside just happened to be some Christmas fabric of Tina Givens' new line, Star Flakes and Glitter. After playing around a little with some ideas, I finally landed on making a pillow with an envelope enclosure...which can be whipped up with any block or design in just a few short hours. Plus, more than likely you already have a pillow form around the house...no trip to JoAnn's and you have 'spiffied' up your house in a few simple steps. :) So here we go... 

Materials:
  • fabric for your pillow top {keep in mind how you like for your pillows to look...really stuffed or not so much...this will make a difference in what size your finished pillow top and the backing need to be. I like a stuffed pillow, so I made my pillow top the exact size of my 18" pillow form and sewed it together with a 1/4" seam allowance .}
  • fat quarter for the backing unless you are using a 24" X 24" pillow form
  • batting {just a little bigger than your pillow top and back}
  • muslin {just a little bigger than your pillow top and back}
  • steam-a-seam
  • and the usual...rotary cutter, mat, matching thread


1. You first need to decide what size pillow you would like to make. {14" X 14", 16" X 16", 18" X 18"...or stuff one and make it whatever size you want to} I made an 18" X 18" pillow. 2. Choose your design. I chose to fussy cut the polar bears with their own 'border' and let them shine by doing a simple border in 2 other fabrics. My center is 12" X 11 1/2".


2. I then cut 2 strips of my grey solid, 1 1/2" X 12" and sewed each piece to the top and bottom of my fussy cut polar bear center.


3. Next, I cut 2 strips of grey for the sides, 1 1/2" X 13 1/2". Remember that when you are cutting your strips for the sides to include the measurements of your top and bottom strips. {You may find it easier to cut the strips as you go.}


4. Added on the pink poinsettia fabric border, 2 1/2" X 13 1/2" for the top and bottom and 2 1/2" X 18" for the sides.


**This is where the 'way you like' your pillows to look is important. For my 18" X 18" pillow I made my pillow top exactly 18" X 18" and took a 1/4" seam allowance. But if I didn't want my pillow to be as snug, then I would have made it 18 1/2" X 18 1/2" to leave room for a 1/4" - 1/2" seam allowance. 

5. At this point I made a quilt sandwich with batting and muslin.


{I only folded back the batting to show you that the muslin was on the bottom.}
6. I quilted my pillow top in the ditch of my borders to keep it simple using a light pink Aurifil thread. Once that was complete, these perfect little squares were made at the corners of the grey fabric, so I decided that they needed a little embellishment. I made french knotted 'snowflakes' in each corner with variegated purple and pink embroidery floss.


7. Next begin working on your envelope backing. Cut 2 pieces from your fat quarter measuring 18" X 12". On one 18" side of each piece, you must make a hem. I like a finished double hem. I cut 2-18" pieces {for each backing piece} of steam-a-seam and placed it right up against the edge.


8. Then used my iron to set the fusible side to the wrong side of the fabric and peeled away the paper lining.


9. Using steam-a-seam helps to create a perfect 1/4" hem...it takes the guessing out of it and speeds up the process. Just fold the edge over and set with the iron.


10. To create a finished double hem, fold over 1" {or however big you like your hems}. Press and topstitch 1/8" from the top of the fold. {I use my edgestitching foot.}


11. Repeat steps 7-10 for the other backing piece.
12. An envelope closure overlaps in the back by 3"-6". You decide what you like just making sure that you cannot see the underneath hem once the pillow form is inserted.


{I pin my flaps together so that they do not move when I am sewing the top and back together.}


13. Pin it right sides together and sew 1/4" - 1/2" seam. {For an envelope closure you do not have to worry with making sure that you leave a hole to turn it right side out...one reason why I like envelope closures. :)} Turn right side out, really working on the corners. You can even clip the corners {on the wrong side} at an angle to get rid of some of the bulk if you need to.


14. Stuff your pillow form inside and voila...


Here is a picture from the back...


**If you are making a a non-standard size pillow and stuffing your pillow...you would sew up all 4 sides but leave a hole on the bottom to be able turn it right side out. Stuff your pillow. Then either hand stitch the closure or sew extremely close to the edge where it is nearly invisible. {I prefer to hand stitch my closures.}
And there you have it...an easy and quick way to decorate for the holidays or any regular old day for that matter!
Thanks Rebecca for letting me pop over to share...this was fun!
__________________________________________________________________________________

How cute are the polar bears?! I love seeing peeks of new fabric! This is a great project for fussy cutting a fabric, and is a really great project if you just want to buy a small bit of a focal print. And I've never thought to use Steam-a-Seam on a hemline. Thanks Bianca!

Tell us in the comments what you've been working on for the holidays!