Monday, December 29, 2014

Wedding Recap - a DIY Bride


Well, as a married lady of a little over 2 months, it's all settled down and I have life back in order, and more importantly, have all my professional photos back ;)

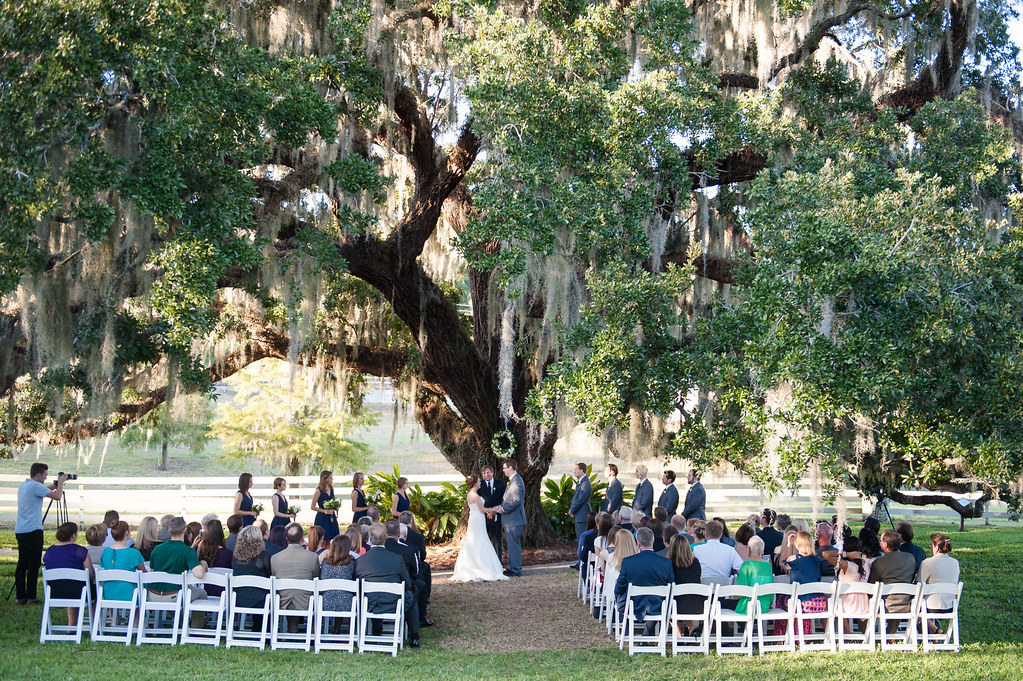
If you live in the Central Florida area, I'd highly recommend Sarah and Ben, who took all the photos in this post and who are just all around fabulous people. The photography was my most important part of all the vendors of the wedding day, so I was a fierce critic when researching photogs!

But as promised, I wanted to show off the DIY parts of the wedding day. Partially because I was tickled with how it all turned out and in case anyone is looking for some inspiration for their own wedding/event, or those of you who just love wedding photos [I do!].


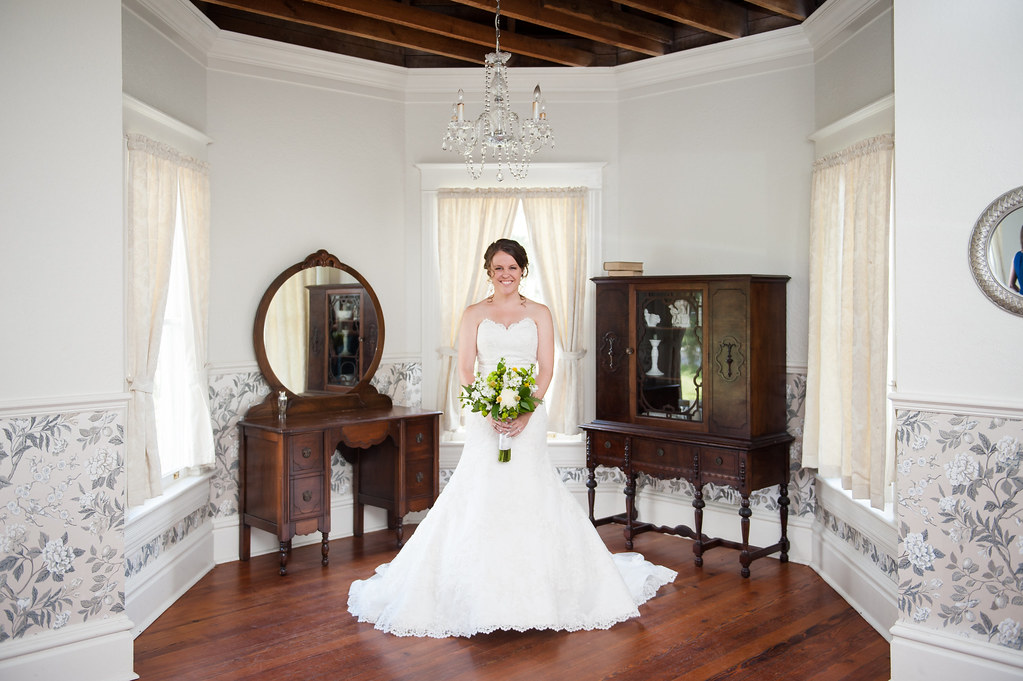
My dress came with an attached beaded belt that I hated, and had removed during production, because I had a specific vision for a belt. I found some beading from China on Etsy and bought some beautiful silk bridal ribbon from my local fabric store. While not super noticeable from afar, it was just the little touch I wanted. I sewed the ribbon to the beading with some invisible thread and we were in business! Total cost of about $15, as compared to the ridiculous prices of wedding belts.


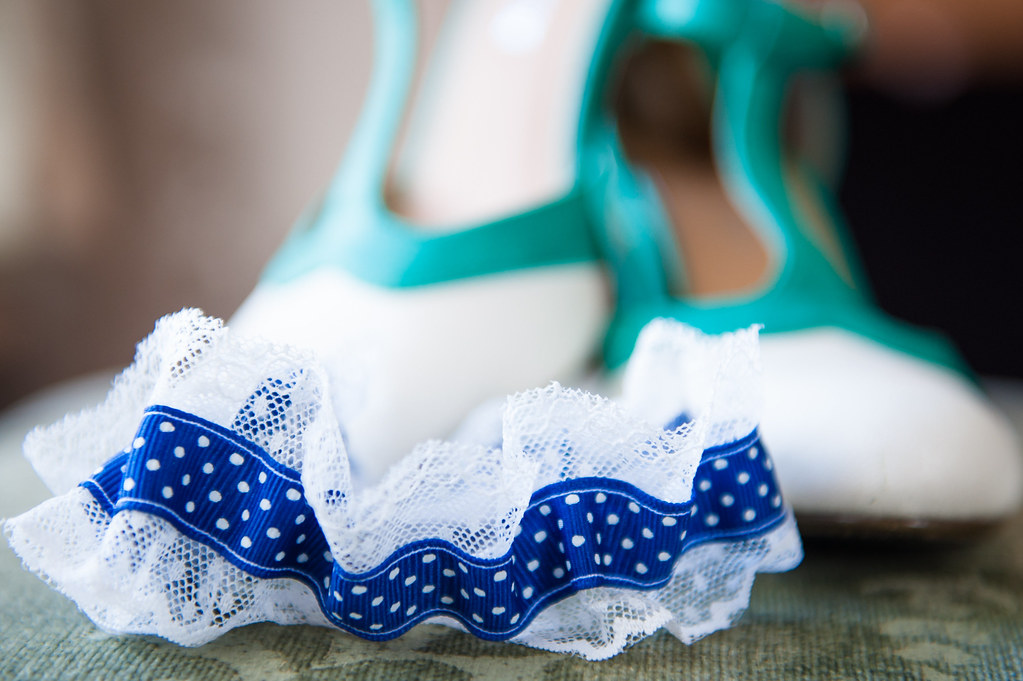
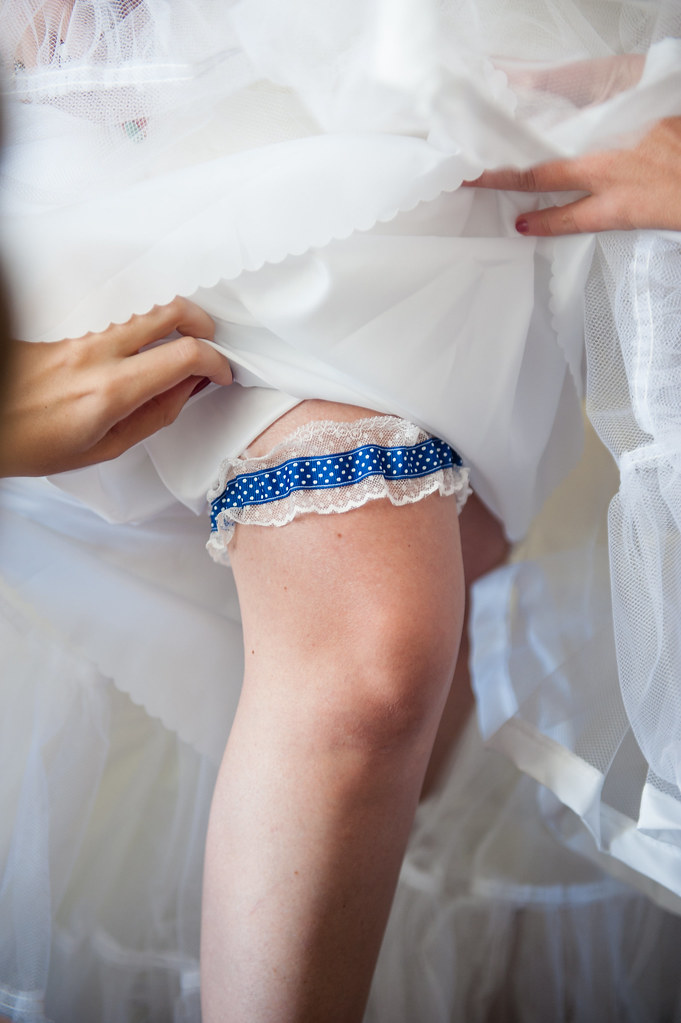
I also sewed my own garter and it was so simple! I love polka dots and wanted to incorporate them as much as possible without being obnoxious, so I got some polka dot grosgrain ribbon and some polka dot lace netting, along with some 3/4" elastic. I sewed the garter at a couple inches smaller than the circumference of my leg. Total cost of about $5.


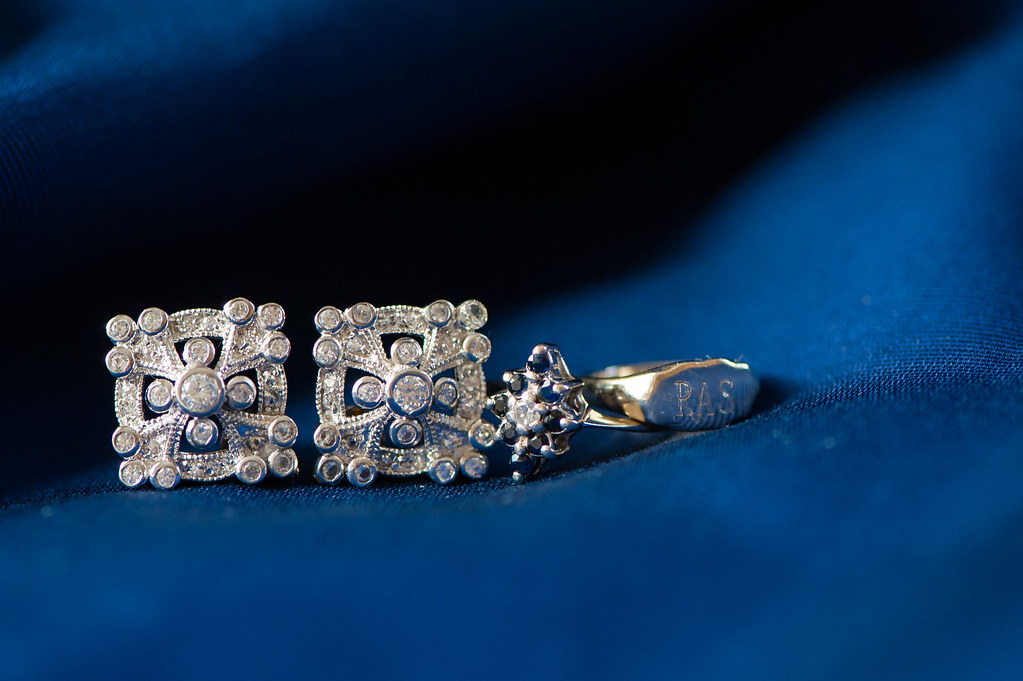
I created the earrings I wore by scouting around for some better quality costume jewelry and creating my own with some assistance from Stephen using pliers and a soldering iron.


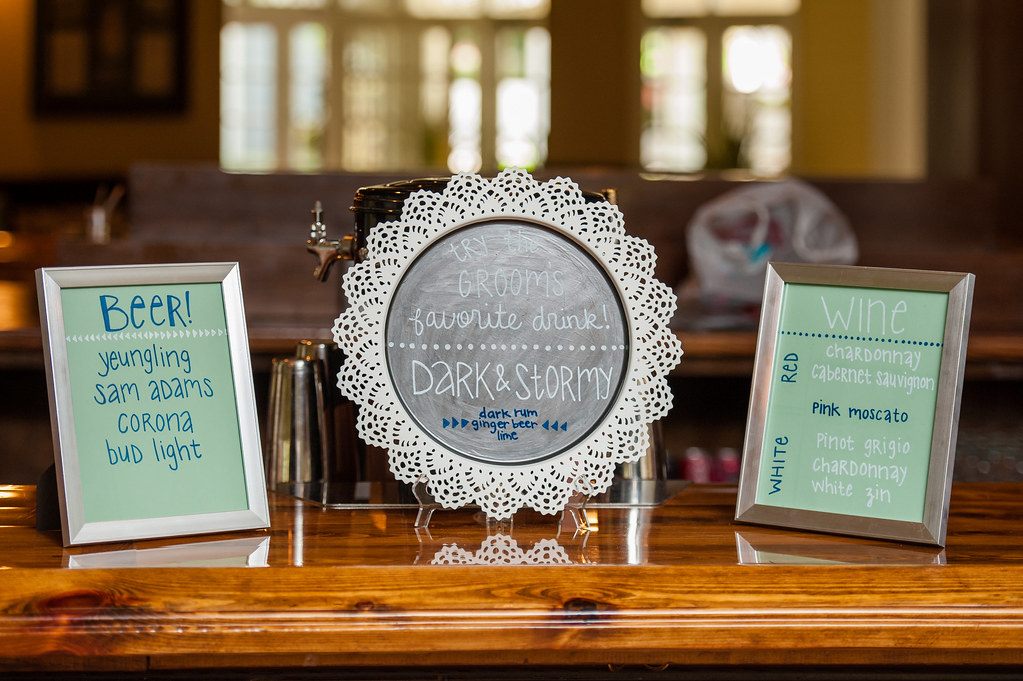
I painted all the signage at the wedding over the weeks leading up to the big day. Our colors were mainly gray and navy with pops of mint and yellow. I bought picture frames when I had coupons to Michaels or Joann and then created inserts for the welcome sign, alcohol lists, etc. The table numbers were tiny square canvases. I already owned the white plate from IKEA, and I just repainted it. Total cost was less than $50, and we've already reused the frames. If you look closely at the picture with the canvas table number, you can see tea lights on the table as well, which were wrapped in silver washi tape to coordinate with the mercury glass votives.


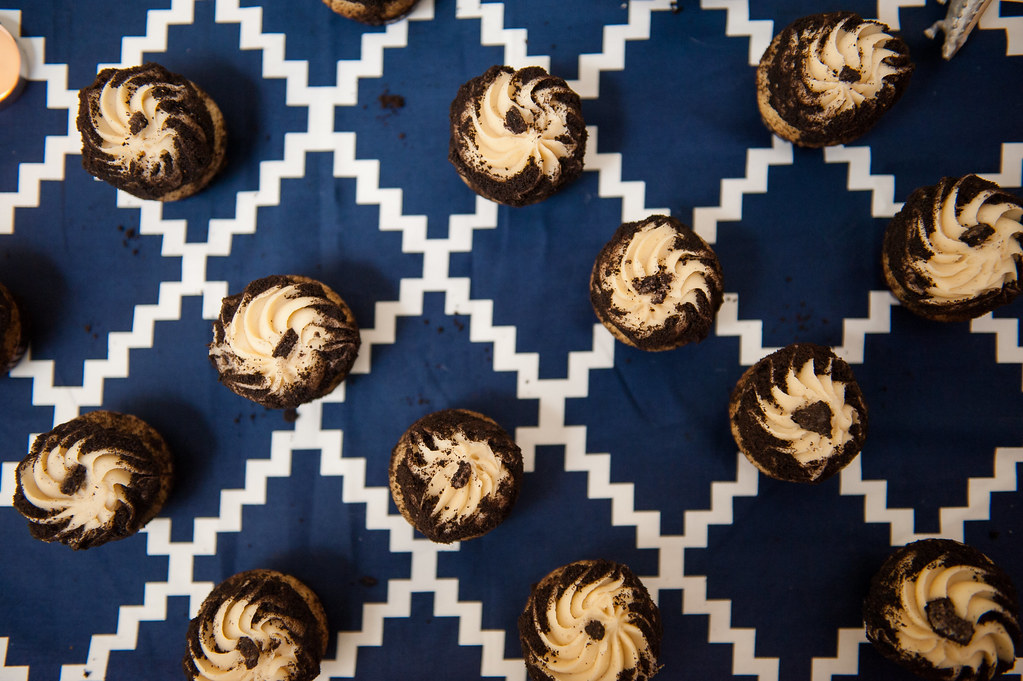
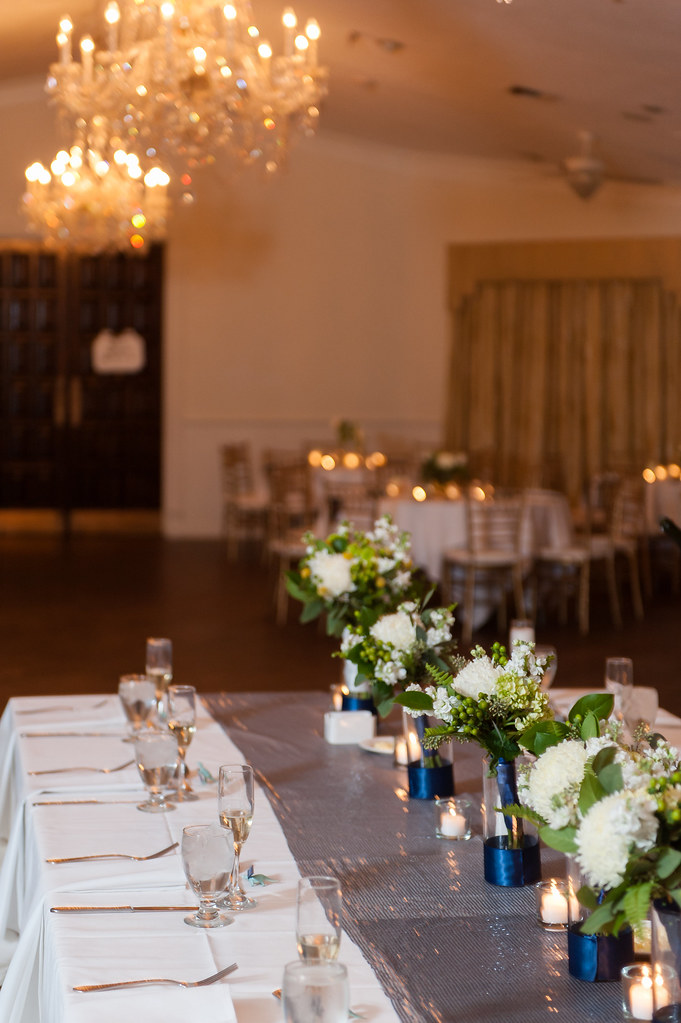
The table runners were all cut and hemmed by me. The navy for the 10 guest tables was just cheap cotton that I got for about $2/yard. The cake table runners were a navy geometric print sateen that I picked up for $5/yard from my local fabric shop earlier this year. I saved that fabric and washed it after the wedding so it can be used for pillow shams. The head table was a king's table, so it was long, and required a special table runner [obviously] so I picked up a pewter sequin fabric for $8 that I had to sew together to make long enough. I'm still picking sequins off my carpet, 2 months later.


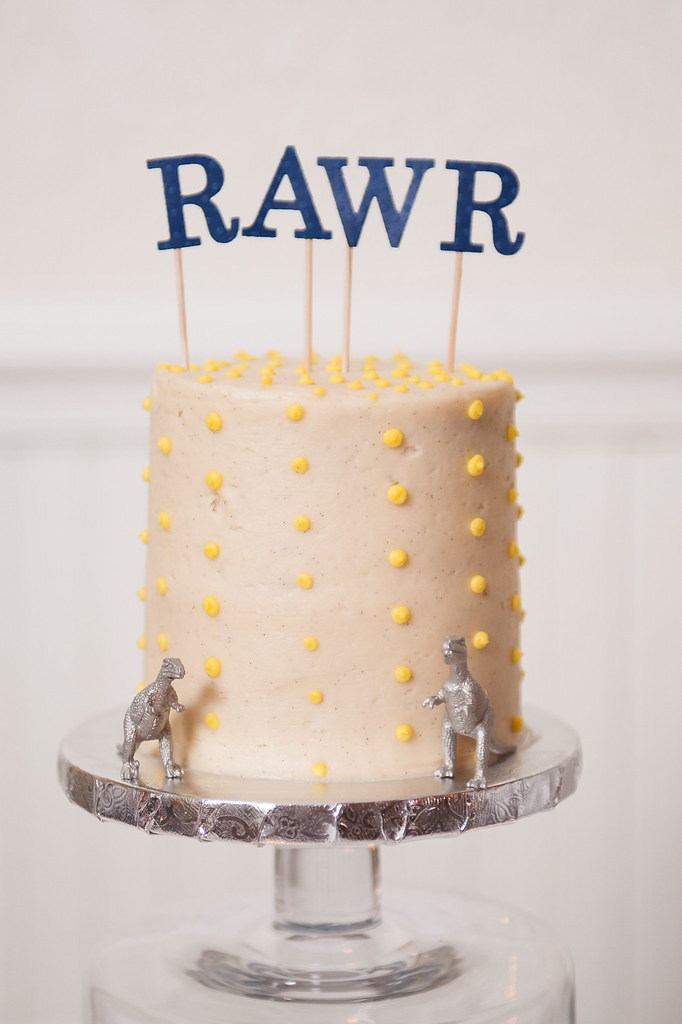
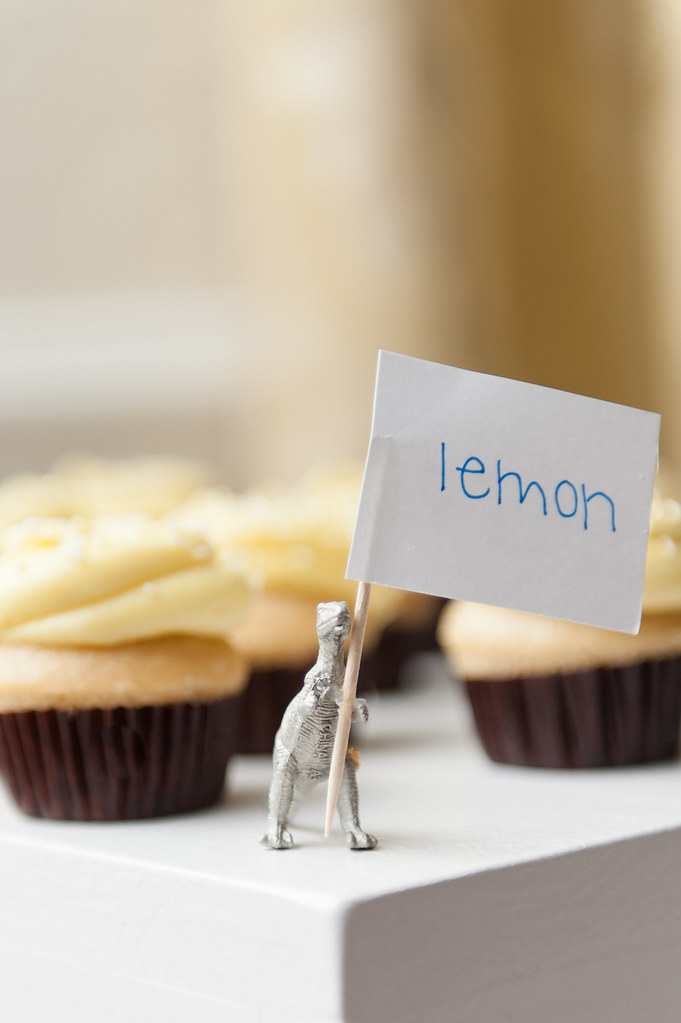
Stephen and I wanted our wedding to be classic but we wanted to introduce a small bit of whimsy as well. Enter, dinosaurs! I love dinosaur jokes, tshirts, pretty much whatever has a T-Rex on it. So we bought bulk packs of tiny dino figurines on Amazon and spray painted them mint and silver and used them for the place settings and for the cake table. I also made the cake topper [RAWR means I love you in dinosaur, dontcha know] using die-cut letters and toothpicks. Superglue was definitely our friend the last couple days.


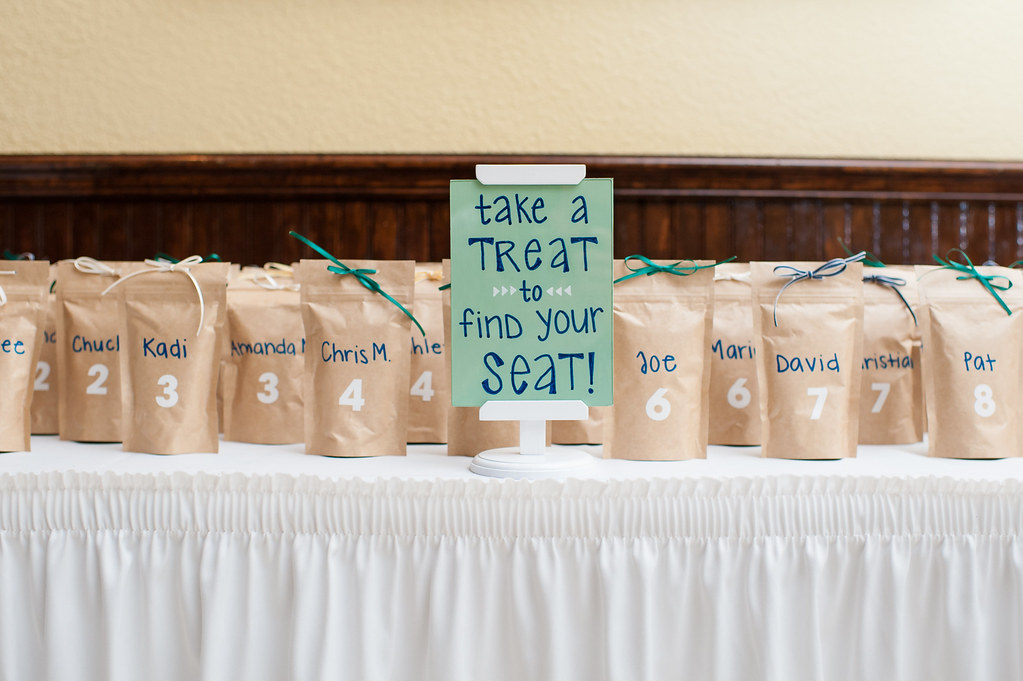
Our seating chart doubled as our favors. We found these AHHHMAZING salted caramels on Etsy [do yourself a favor, please] and ordered several pounds. Fun fact: I don't like chocolate. So the salted caramels were a win for everyone. We then paired that with a Kona coffee blend that we got from friends of ours who have a coffee and tea distribution company, because we love both Hawaii and coffee. We packed them together ourselves a couple days before the wedding, assembly line style with my family.

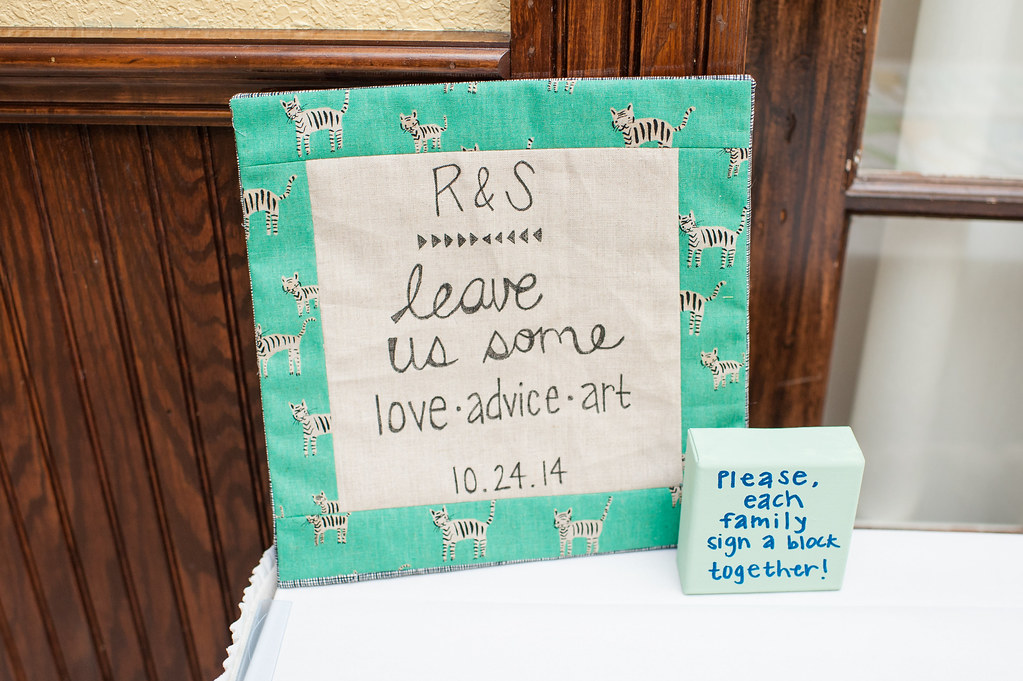
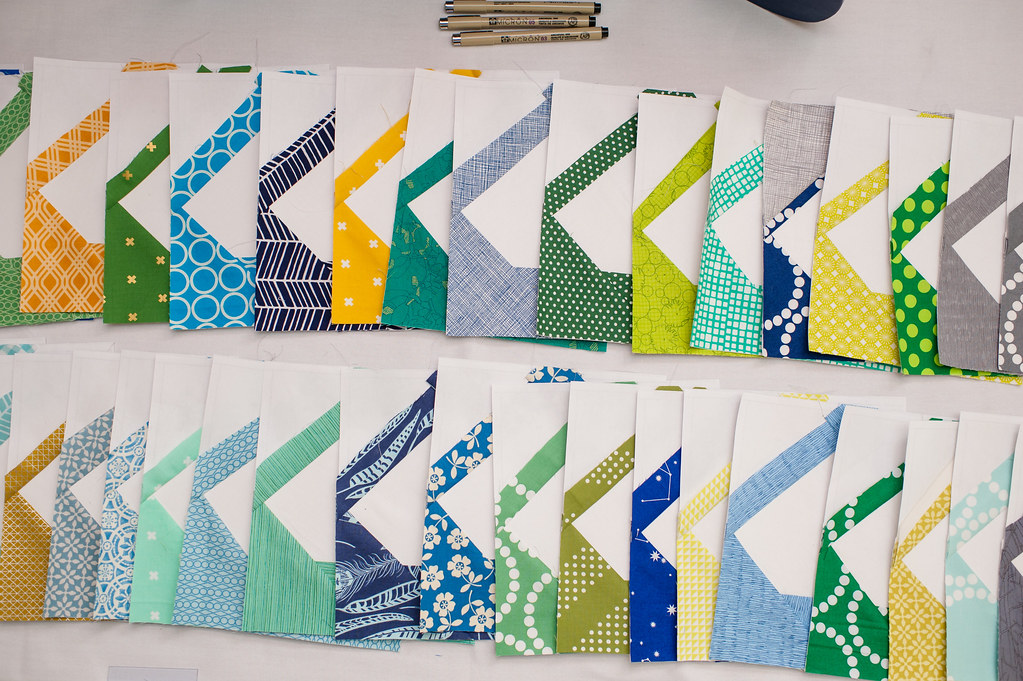
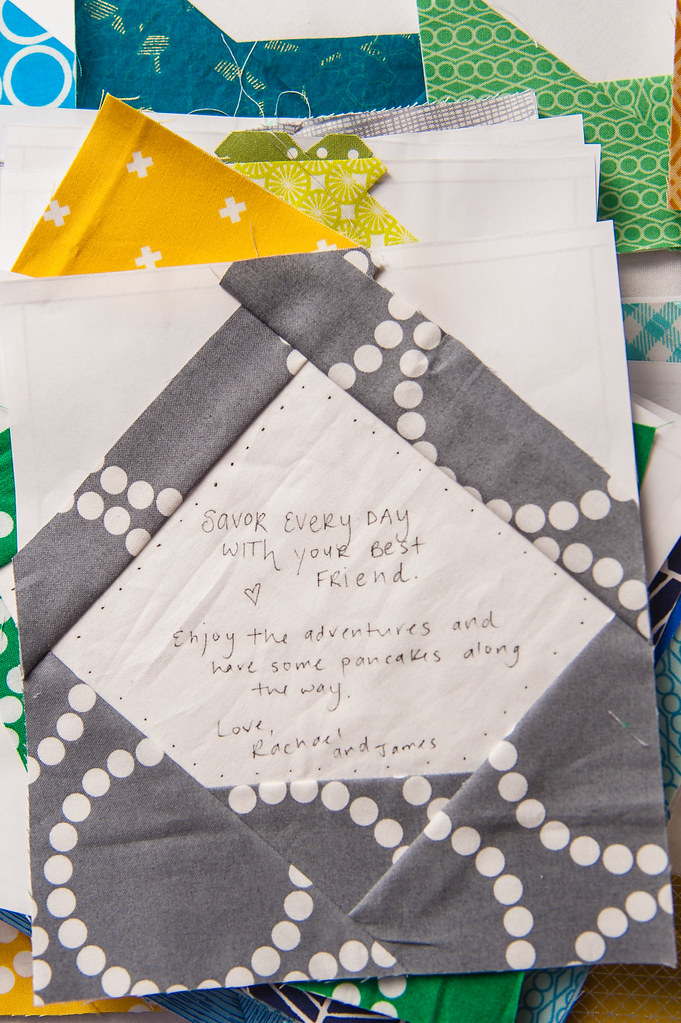
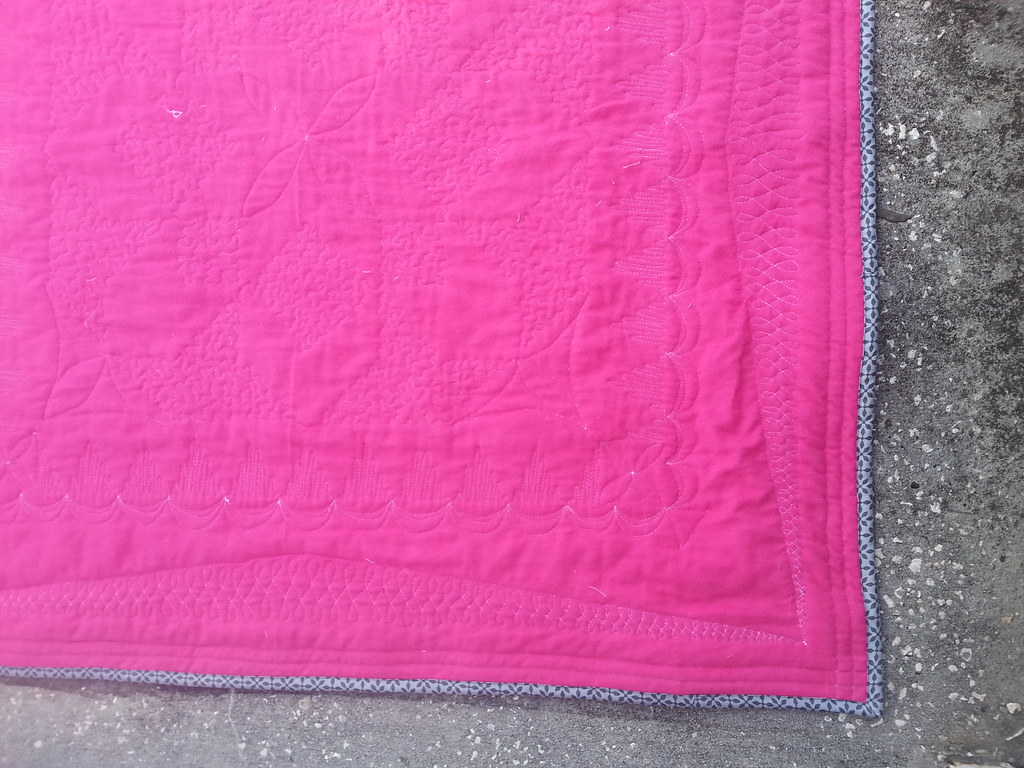
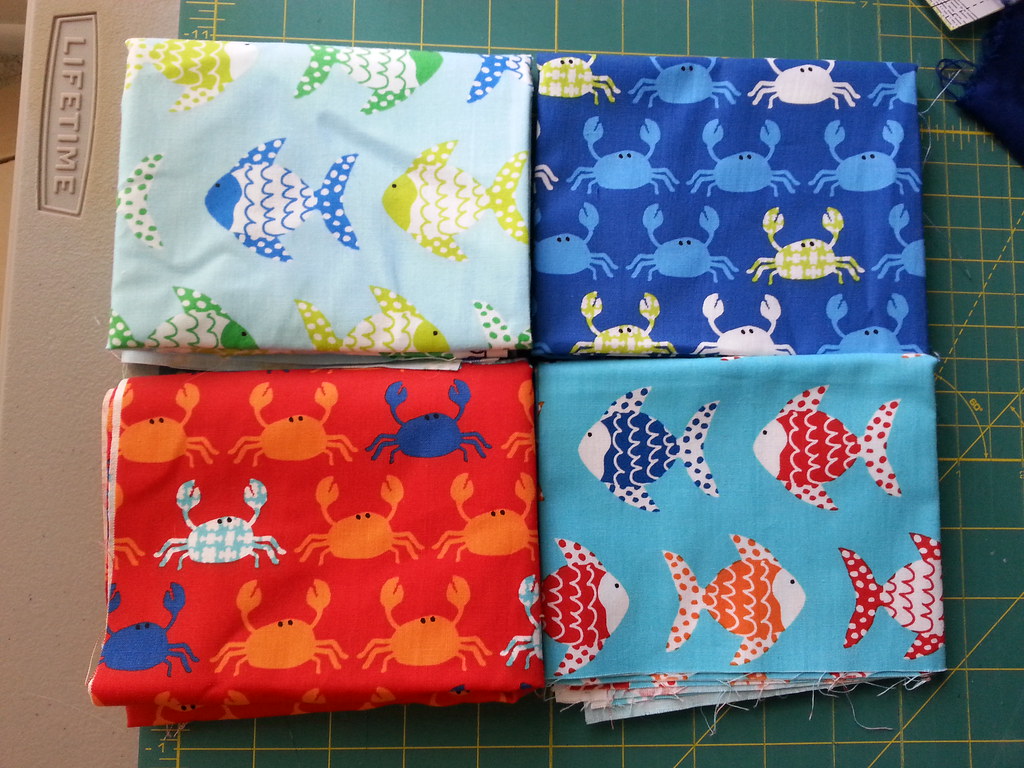
And finally, the wedding guest book quilt. I sewed together most of the paper pieced envelopes, enlarged to be an appropriate size for writing a note. I ran out of background fabric/time [seriously, where does all the time go leading up to a wedding?!] so I put up a guideline envelope to show everyone where to sign. I painted our monogram for the table and bought a bunch of Micron pens. The quilt will obviously get its own post once I hunt down the few remaining people who didn't sign squares. I love the photos of the table set up because it makes me very pleased about my color choices. I also plan to turn the Cotton & Steel framed sign into a pillow, because cats :)

So in the grand scheme of things, maybe not the most DIY wedding in the world, but I thought it was a nice mix of handmade and small business, that it represented me and my vision, and that it didn't drive me crazy during the final days.


Thanks for reading this novel of a post. If you've made it this far, go order yourself some caramels.

Friday, October 31, 2014

Bloggers Quilt Festival Fall 2014

Ahem. It's been awhile, huh? Since I last posted I have: gotten a promotion, gone to a Garth Brooks concert, and last but not least, gotten married. So obviously I've been really busy, and sadly my sewing has suffered. I do plan to do a round-up post of all the sewing and DIY that I did for the wedding!


Luckily, I have some backlogged projects to show for the Bloggers Quilt Festival!


I made this quilt earlier this year for my boss. She was set to give birth in late February and we were going to have a nice baby shower where I could gift it. And then in January she ended up leaving suddenly and being placed on bed rest and my best laid quilt plans were in shambles. So this didn't get finished until June...shame on me!


Her baby's nursery was decorated in pink and gray, so I collected fabrics in that color scheme for a while. I don't do pink, so I went hot pink where I could. I used the Firework block from Simplify and reworked it to a size that I no longer remember. And then I just added borders as I felt like it.


Originally the triangle border was random between the pinks and low volume, but I hated it, so I ripped it out and alternated between the pinks and gray/white. I also tried a checkerboard border and hated that too. So I went simple and tried to let the fabrics shine. I really enjoyed manipulating that gray Riley Blake bias stripe fabric throughout the quilt.


And then the quilting. Oh, the quilting. I really wanted to stretch myself in my FMQing on this little baby quilt. The back is hot pink flannel, so I knew the stitches would really sink in, and it's small enough to really wrangle through my machine. There's some stippling, orange peels, figure 8's, straight lines, scribbly lines, and clamshells.


I bound it in one of my favorite prints from Jeanean Morrison's Silent Cinema line, wrapped it all up, and gifted it to my boss, who loved it.


I figured I would enter this in the Home Machine Quilted category, because even though I know there are some amazing entries of people who are far more skilled than me, I'm proud to have pushed myself on this!

Stats:
Approximately 44" square
Fabrics used: Kona White, Metro Circles, Pearl Bracelets, Echino, Swiss Dots, Silent Cinema, Joel Dewberry Herringbone, Aneela Hoey, Happy Zombie, Riley Blake bias stripe, Botanics, Alexander Henry crosshairs, etc
Quilting: various FMQ designs by me on my Viking Sapphire

So thanks for following me on my quilty journey and enjoy the rest of the Festival!

Tuesday, July 22, 2014

Cover quilt of Quilty

What a happy Tuesday!

I took a 5 minute mental break at work and scrolled through Facebook on my phone. Only to see that Fons and Porter's Love of Quilting Facebook page has a poll open for the cover quilt of their September/October issue...


...and the one on the right is mineee!!

I actually went over to my supervisor and said "hey, pretend you care about sewing and quilting for 2.5 seconds so I can tell you some exciting news." She did an admirable job haha.

So if you'd care to vote [you know, you can vote for whichever one you want to, but I'll give you an extra twinkly smile if you vote for mine ;) ] then visit the survey here.

Also, it's hard to read the comments on the Facebook post and not take it personally - I guess I'd never make it in a quilt show.

Wednesday, July 16, 2014

A Finished Tshirt Quilt

Hi all!

We're in the middle of a very typical Florida afternoon thunderstorm right now, which always makes me think of a nap, which then makes me think of snuggly quilts!

Quite a few months ago at this point, an old friend from elementary school reached out to me. We follow each other on IG and she posts just the best pictures of the adventures of her and her little boy. She wanted me to make a tshirt quilt for him. Being the sentimental person that I am, I suggested she meet me at our old elementary school and she gave me a bag full of tshirts and onesies.


I also discovered some newborn blankets in there.

So I cut up these tshirts and onesies and blankets and interfaced them with lightweight interfacing. Some of the onesies were not quite up to the 9x9" square size that I was using, so I pieced some of them together [which I was kicking myself for by the end]. The layout ended up being 6 by 7, which was quite a bit bigger than orinally planned, because when I started laying out the squares I realized I could make it look a bit more cohesive by light value shirts with dark. I ended up using the blanket pieces in more than one place.


I actually had fun making the top, because I used the tag #maddoxstshirtquilt on IG and so the mom could be an active participant in the decision making, and see the progress and get excited. Yay social media!


The reason this thing deserves a post is because of the quilting. No, don't squint your eyes at the screen, there's not some spectacular quilting there. It's just FMQ stippling. But OH. MY. GOSH. I think I almost gave up quilting with this thing. I used stretch needles [even though the back was Kona cotton], because I thought it would make the front look better. And I used my typical white Gutermann thread on top and invisible thread in the bobbin. I've used invisible thread before and been fine. I've used a stretch needle before and been fine. But clearly this quilt was my test.


I BROKE 23 NEEDLES FOLKS. TWENTY THREE. Phew, it feels better to get that out.


At one point I almost cried in sheer frustration. So I stocked up on needles, and I turned to Amazon to buy YLI invisible thread. Through an overwhelming sense of stubborn-ness, I prevailed, and finally finished. And it doesn't look like I broke a zillion needles. It doesn't look like I had a mid-quilting crisis. It looks...like stippling. After the first square I did switch to invisible thread in the top and bobbin, which also made it difficult to see where I had already stippled.

But I think the finished result looks awesome, I've gotten to see her precious little boy snuggling the quilt on IG, and I've actually gotten quite a few requests from her other IG mom friends who are also interested.


I think before I tackle another one, I will definitely figure out how to only use 1 needle for the quilt ;)

Sunday, June 1, 2014

Two scrap packs to destash!

Hi all! Just popping in right quick on this Sunday afternoon - I've got a couple hours of trial prep ahead of me today...I'm the only witness in a trial tomorrow, so I've got to make sure I'm a well-oiled machine!

I spent a couple hours yesterday organizing fabric and then started listing bundles on Instagram [I'm sewfestive over there!]. I've got 2 left, so I wanted to let you know over here on the blog.


I've got a solids pack that is mostly Kona solids, with some Cotton Couture, and a couple pieces of Essex linen blend. $8, including shipping [within US]. Also, hey, it appears I never use orange...


And a pack of 93 strips, varying in width from probably about an inch to 4 inches and anywhere from about 5 inches to WOF in length. $12, including shipping.

These fabrics are all unwashed and come from a smoke-free home. If you're interested, please say which one you'd want and I will respond to your comment to get your Paypal email to send an invoice.

I've got larger cuts of fabric that will be posted on IG throughout the week that I just don't think I'm going to use and need a new forever home ;) - so make sure to add sewfestive if you want to snatch up some fabric at low prices!

Have a great week!

Sunday, May 18, 2014

Blogger's Quilt Festival - Spring 2014


I have really loved the Blogger's Quilt Festival in recent years, because as Instagram has become more popular, I like to follow the #quiltmarket posts and drool over all the upcoming fabrics...the Quilt Festival helps me get through not being at Market in person to pet the pretties. Plus I really like getting the opportunity to find more blogs to follow :)

Here's my entry to the Festival...Emerald Ikat - entered into the Original Design Quilts category.


I drew this up a few years ago and then sat on it for a while. I just submitted it to Fons and Porter's Love of Quilting last fall on a whim, and when they accepted it I realized I had to figure it all out. I pieced mine using templates, but I also created a paper piecing version for the magazine.


I personally don't really like to paper piece, but I can't deny the accuracy. I got some pretty perfect points without it though!


The thing that I like the least about making projects for magazines is the tight turnaround between the acceptance of your submission and when the project is due. I have a day job that I work about 55 hours a week on average for, and I don't usually make my projects ahead of time because I don't have the funds/time to just make all the quilts that come into my head. Nor do I have oodles of people to give quilts to. So I want to know that a project needs to be made before I get started. That usually means I end up with a marathon of late-night quilting.


My cats usually think they're being helpful during these late night sessions. For this particular quilt I even sent an apology to the editor saying it would probably need to be lint-rolled when it arrived on their end, because there's just not an inch of cat-free space in my tiny apartment. Luckily, her response was that they love cats and totally understand that cats love fabric too! :)


I took pictures just outside the post office before mailing when I realized I wouldn't see the quilt again for about 6 months. It's a really big post office and I got quite a few stares and several questions. I usually take it as an opportunity to educate people about quilting and show them that young people can quilt too!


The backing is a fabulous curtain from IKEA - it's a polyester blend, but I took a chance and it worked out just fine. It was a pain in the butt to baste though, so fair warning. The binding is a black crosshatch from an unknown line [I have several in my stash from different collections, and I totally should have labeled them!].

Enjoy the rest of the Blogger's Quilt Festival, and thanks for visiting!


Emerald Ikat
Size: approximately 48"x 64"
Fabric: mixture of low volume black and white prints, various Kona green solids, various green small-scale prints, black Oval Elements, black Domino Dots, a black and white polka dot, and the charcoal star flower print from the Washi collection.
Quilting: squiggly lines following the diamonds within the white sections

Monday, May 12, 2014

Sew Mama Sew Giveaway Day! - Giveaway closed and winners announced!

Congrats to Sharon E. [#39] and Mom C. [#136] as the winners of my giveaway! Thanks to all who entered :)


Hi all! Welcome to my little corner of the Interwebz.

For those of you visiting for the first time, I'm Rebecca. I've been quilting/sewing and blogging for almost 3 years now [meep!] and over the past year I've also worked in child welfare, which has caused my free sewing time to take a huge nosedive. Like many of us, I'm still perfecting the balance between life and my hobby, but if you want to see projects from some of my busier sewing days, just click on the Finished Projects tab at the top! I haven't updated it recently because I'm a bad blogger lol.


This is my recent favorite project - it's a quilt that is in the May/June edition of Fons and Porter's Love of Quilting, and it will get it's own post one of these days :)

On to the giveaway!

There are two winners here:


A set of 36 squares cut from my low-volume fabrics that measure 4.5"


and 4 fat quarters of Laurie Wisbrun Don't Be Crabby fabrics


Here's the rules:
-This giveaway is open internationally
-Please leave a comment stating what your next sewing project is and which fabrics you'd prefer. If you are a no reply blogger make sure you also leave your email address.
-You get a second entry for being a follower, so leave a comment saying if you are!
-This giveaway is void where prohibited and will end on May 16th at 5 pm. I will notify the winner on this post and by email on May 18th.


Now go spend some time entering all the other giveaways at Sew Mama Sew! :)