Showing posts with label new technique. Show all posts

Saturday, April 28, 2012

Sartorial Saturday: The Prom Accessory Edition

Today is Prom!
You're doing your hair and makeup, putting on your dress, and grabbing that clutch that will hold your camera, allowing you to take pictures of all your friends for you to immediately upload to Facebook when you get home. And you couldn't find a clutch that you liked, so you asked your big sister to make you one. And because she's been listening to your Prama [Prom drama] for several months now, she agrees to do it so that you will have as perfect a Prom as possible.

Ok, so this doesn't really go with Sartorial Saturday.


But I've barely sewed all week because of moving and job interviews and deciding to refinish my living room coffee and end tables [stupid timing Rebecca], so this is where the Prom clutch ends up.

And since I think this will be the only time I ever make one of these I figured I'd share.


I used a silvery satin. And 3 freaking layers of a stiff Pellon interfacing. The lining [from the Moda Cape Ann line] has a thin interfacing fused to it. Sewing them right sides together was fine. Turning it right side out was a bitch. It crinkled pretty good, so my sister is going to steam it.


I used super glue to place it in the metal frame. The holes mean that technically it's a sew-in frame. But I didn't have time for those shenanigans.

The black balls were supposed to be removed for some teal beads, but the beads weren't quite big enough. Oh well.

I never want to make one of these again because it was quite stressful. But my sister is going to look top-notch, so it's all worth it! :)

Friday, December 9, 2011

Zipper successes!

My Friday Finish today [which I am celebrating with crazy mom quilts, as per usual!] is also a sewing milestone yay!

My 1st zipper experience.

And now I feel like I need to go sleep for days. Seriously, I feel mentally exhausted.


So my parents asked me to make 2 pillow covers for them so they could use some autumn throw pillows into the winter without having to buy new pillows. Since I can't really justify making more pillows for myself at this point, I was totally game.

Their house is decorated Americana style, and so I knew that they wouldn't go for anything that screamed modern. I drew out some designs and they picked 2 they liked. And then I totally deviated from those designs :) Artistic license, right?


I have lots of extra little pieces of Countdown to Christmas from the various projects I've used it in. Gosh, I love this line! I was originally going to do multiple strips of pieces in a single color, from multiple fabric lines. But hey, I started cutting, and this is what happened. Sometimes I can't help it. And then I found some white ric rac, and it got thrown into the mix too!


A zipper happened when I didn't have enough of the fabric I wanted to make an envelope closure. I had picked up a few zippers to make some pouches/clutches for my little sister [they have dinosaurs on them!]. I put my computer next to me at the table and pulled up the invisible zipper tutorials over at Sew Katie Did and Stitched in Color. I find that 2 tutorials is much better than one, in case one person wasn't as clear on an item.

Um, and then I tried to install a zipper. Like 9 times. Near the end I was getting very testy, and thinking it was not fun in the slightest. Very sad, as I think sewing is very fun and relaxing. NO. This was not.


I have no idea what my problem was tonight. I am usually very quick with instructions, and I'm fortunate enough to be very good at most things on my first try. Zippers do not go in that category. I even thought about pouring a glass of wine haha.

Here is my pearl of wisdom for the day: Sewing, and all things associated with it, teach you patience. There is really no fast way to get to many of the things you sew/quilt. Yes, there are techniques that make it a little quicker, but I still wouldn't call it fast.

I didn't press this, so it looks wrinkly and crooked

The back....just as cute!
So. I was reminded to be patient today. If it took me 9 tries, so what. Every time I see that pillow at my parents' house I'll be reminded that I taught myself how to do something and didn't give up. No it's not perfect this first time, but that's what those dinosaur pouches are for :)

Thursday, November 17, 2011

Pretty Little Pleats


First let me say, it was a whirlwind of a weekend in Atlanta. But more on that later!

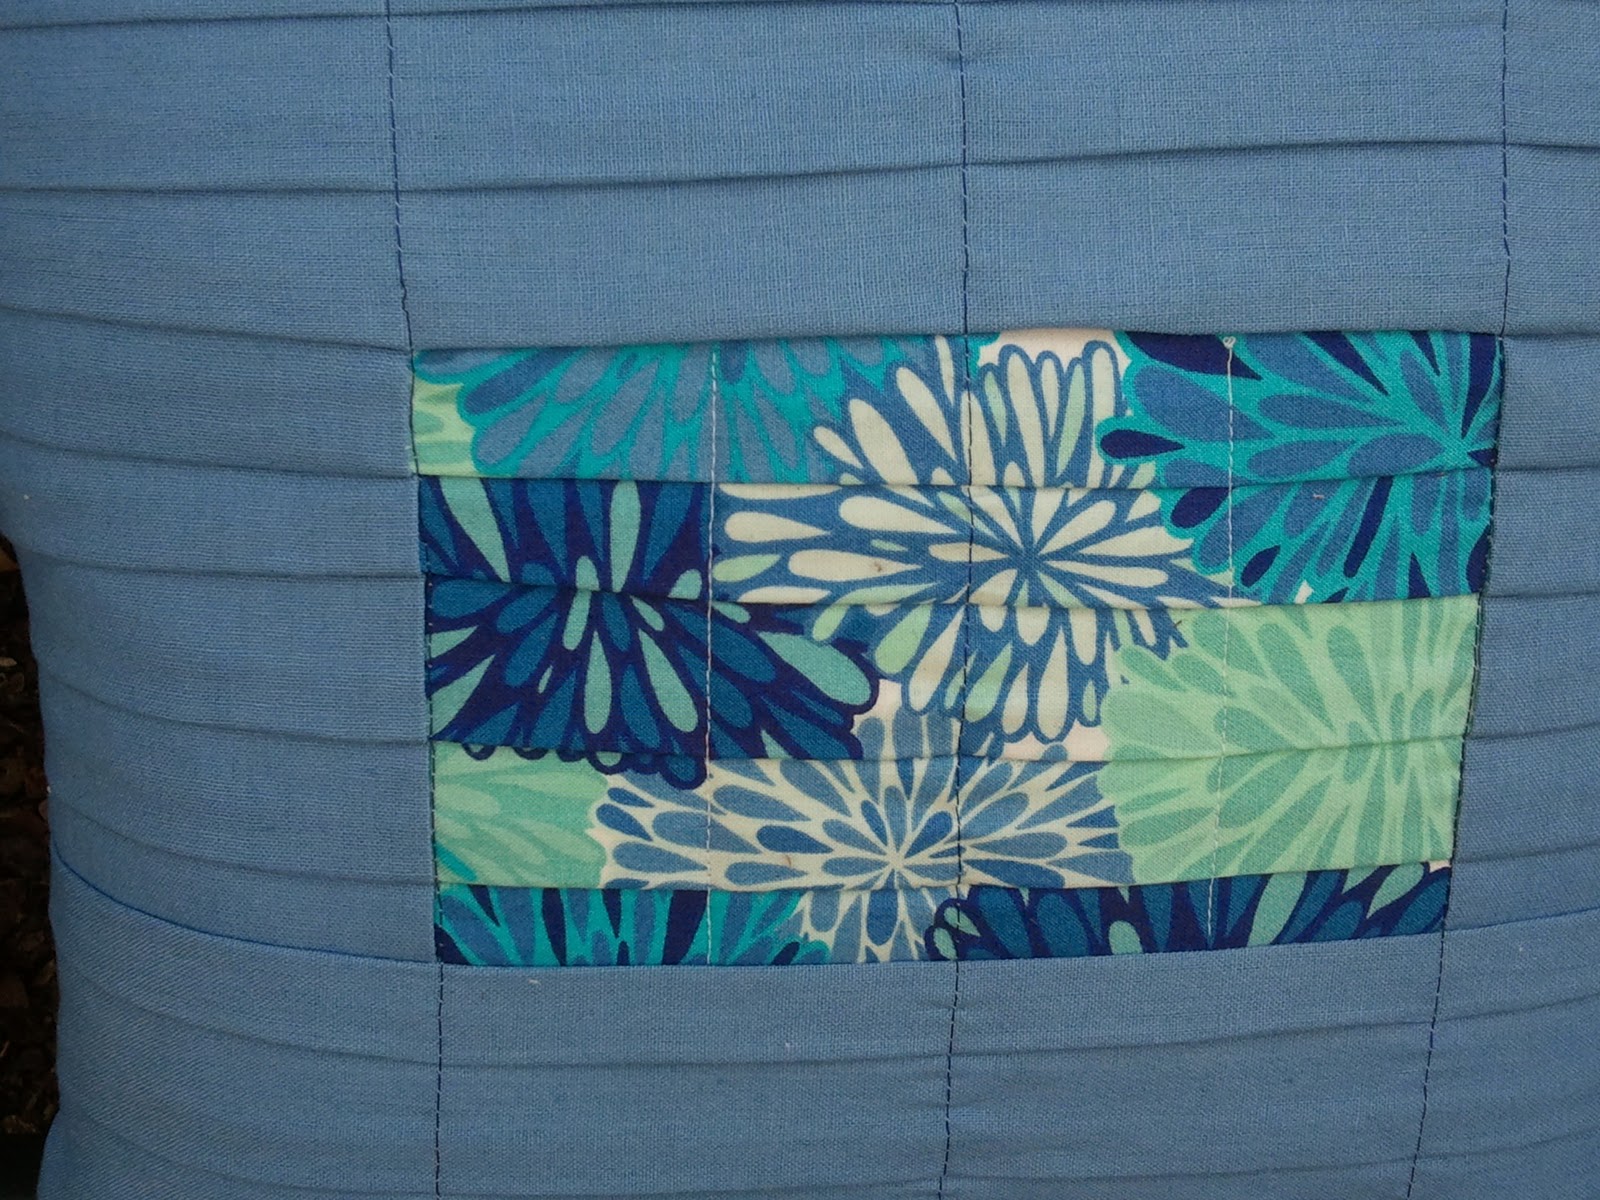
For now we must talk about that cute little pillow up there :) I've mentioned before that I have a love of Essex linen. Once I realized I enjoyed working with it so much I was on the prowl for some good deals on it. So when I came across a shop on Etsy that was having a moving sale, I jumped at the chance and bought 4 yards of the Natural color. But I really wanted to branch out a little, so I got a yard of this fantastic Periwinkle color as well.

And then that fabric in the middle that I believe is a Valori Wells print? That's from a scrap pack that I picked up at some point. Clearly, the two were made for each other.

So I decided to rock out some pleats to dress this pillow up a bit. I wanted the fabric to shine, so I didn't really want to do any quilting.

I started with the scrap I had, and added enough Essex linen on each side to make it the width of the pillow form I had, and then added tons of length. Probably 3 times the length of my finished pillow.


To make the pleats I marked the pillow every 1/2 inch. I ended up enlarging the pleats to 1 inch each, because I liked the larger look. So at every other line that was marked, I folded on the line and and pinned it down to the next line. I don't think that actually made sense when typing it out, but I don't know any other way to explain it, unfortunately. And I didn't get to take any pictures because it took both my hands, and sometimes nearby objects, to fold and hold fabric down and then pin. And really, use lots and lots and lots of pins. And then use some more. I then flipped it over to the back and pressed with an iron, very carefully because of all those pins, in order to give the pleats a more crisp look.

To hold down the pleats I simply stitched with dark blue thread down the pillow, using the sides of my flower scrap as reference. And then another line of stitching down the middle. Because I wanted the middle pleats of the print to look different, texture-wise, from the rest of the pillow I stitched additional lines in that part of the pillow in white thread.


And a simple envelope closure to finish it up!

I think this is a pillow that has a lot of impact considering it's only 2 fabrics and minimal stitching. I also really love that the print stayed essentially the same, even when pleated, because of the shape and repeat of the pattern!

Yay for pillows :) Now go make your own Pretty Little Pleats pillow! Or this pillow is available in my shop if you want the look without the work.

Sunday, October 23, 2011

The One with my Steam-a-Seam experiment

If you will recall, I ran out of time to bind a pillow, and had some Steam-a-Seam Lite on hand. I wondered what would happen if I machine stitched the binding down as normal, and then fused it over instead of hand-stitching.

Front of the pillow
Back of pillow, although it is shown upside-down


 All seemed well in my attempts!

 I think this method would take me a bit of practice, because I must place the Steam-a-Seam far enough down on the binding so that you can't pull it up and see the stitches, like you can in the above picture. Originally I cut lengths of the Steam-a-Seam at 1/4 of an inch thick, as that was my seam allowance for sewing the binding on. However, I think if I were to try this again I would cut them at 3/8".


This portion of the binding shows the Steam-a-Seam melted a little bit outside of the binding so that it can be seen, but that will wash away, and the binding can't be pulled up at all here.


And here's the finished product! The binding is holding perfectly fine. It would be interesting to know if it will hold up better over time than hand-stitching the binding down.

Quilting can be academic! Science and the arts can indeed mingle! More experiments in the future! :)