Showing posts with label pillow. Show all posts

Wednesday, August 22, 2012

Kittens and quilting do not mix


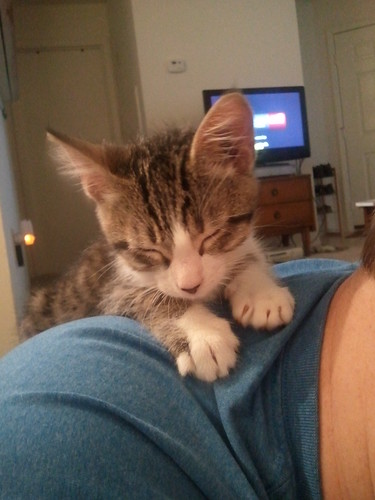
So I've had a kitten [which we named Ares, kitten of war!] for just about 24 hours.

It's hard to sit on the couch and read blogs when your kitten wants to play. All.the.time.


Even harder is figuring out when I'm going to sew! We took him in the sewing/airsoft room and let him wander around yesterday, but there's so many small things and spaces he can climb into that we keep the door closed for now until he mellows out.

I'm not sure that I can sew and keep an eye on where he's wandering to in the room [those of you who sew with tiny children underfoot are clearly amazing].


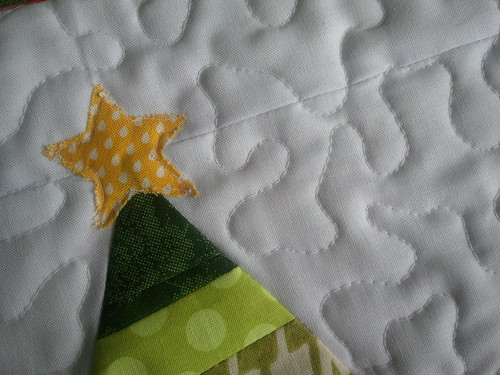
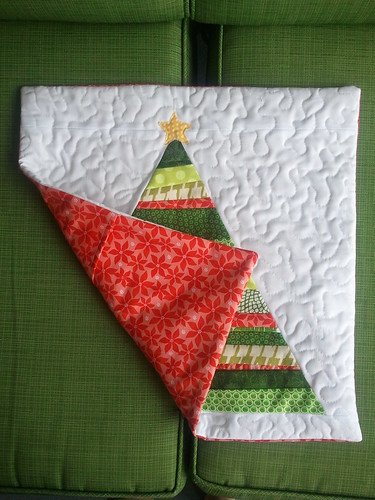
I managed to piece this pillow top on Monday night since I figured I'd be too busy on Tuesday after picking Ares up at the vet. I woke up early this morning to sneak into the sewing room to quilt and finish it with an envelope closure. I would work for 10-15 minutes and then go play with Ares. It took a little bit longer to finish that way, but then I didn't feel bad for not giving him enough interaction.


This pillow cover is destined for The Sewing Studio, which is the store I teach at, for a class in September. It's based off the pillow by Kati over at From the Blue Chair, although I don't use her tutorial whenever I make one. And mine is not paper pieced, because that just seems to make things a little more complicated than needed.


I also like my original version [above] better, so apparently I'm more a fan of a skinny tree?

I'd like to get a bunch of DWR arcs sewn up today, because Jennifer is making me look super bad with all her progress. I cannot find my 8 arcs after we did a huge cleaning and kitten-proofed the apartment...I'm a little concerned Stephen might have thrown them out, thinking they were some sort of scrap project with the paper still on the back of them. Eeek!

Here's to hoping the kitten allows it!

Tuesday, July 31, 2012

Gold Medal Tuesday

Hey! Link up your holiday projects here! Because it's the cool thing to do! 

__________________________________________________________________________

...so I woke up today and realized it was Tuesday.

And then I realized that I'd been sucked into the Olympic vortex. I think I've probably watched all 16 hours of Olympic coverage on NBC every day. The TV is on if I'm awake.

Table tennis? You can wipe your face after every 6 points.
Beach volleyball? The Brazilian women's team goes by their first names only.
Regular volleball? You have to be prepared to hug after every point.
Badminton? The fastest hit was recorded at 265 mph.
Dressage? Whaaaaat? FYI, the horse doesn't get a medal, which I think is unfair.

You're welcome for all that knowledge. I'll be sure to give you an update in a few days.

Now, on to the Olympics of sewing. Otherwise known as the only event I'd get to compete in because I'm exceptionally average [oxymoron? yes/no?].

I need 510 charms for my queen-sized quilt.


I have 280. And no more fabrics that work with my color scheme. Epic fail. So I think that I don't even make it to the medal podium for that effort. I wish I'd won gold so I could pawn it for some fabric money...


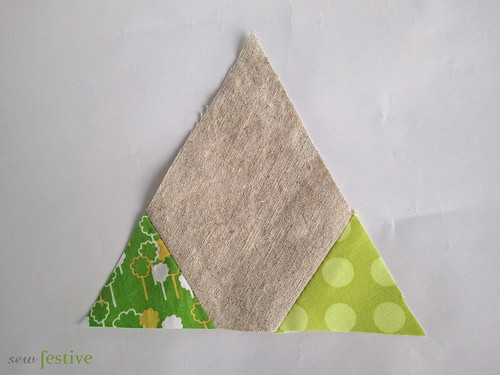
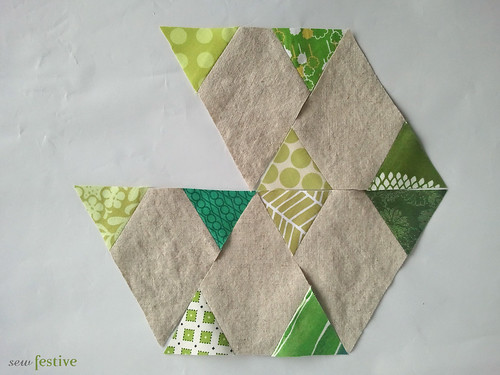
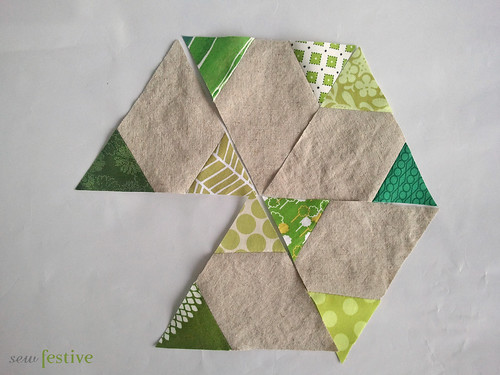
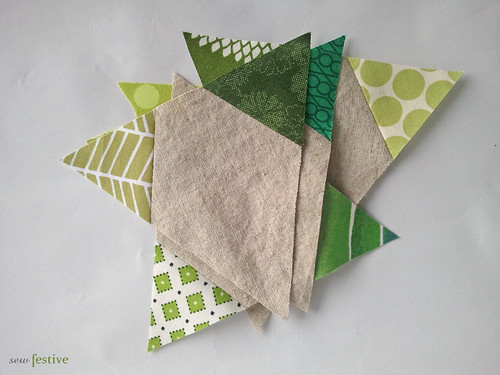
I started working with a new project earlier today. In various shades of green paired with Essex in Natural. I'm not sure what it will become, but I've toyed with a triangle design for my king-size bed quilt, so this is helping me see if I like it.

Here we have a very orderly layout of triangles
And here we have a haphazard turning of triangles. I'm leaning towards this.

I know I want to make bigger blocks next time though. Maybe I'll keep making baby triangles and turn this into a shower curtain?! [slowly but surely letting patchwork take over my house; don't tell Stephen].


Because I like the project so far I'm going to award myself the silver in this event. 
::the crowd roars its approval::


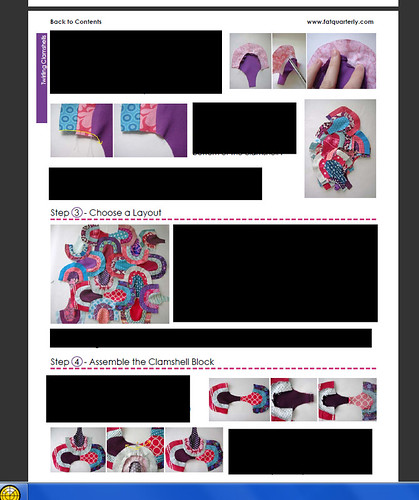
And today is the day that Issue 10 - Sew Britannia of Fat Quarterly is available for purchase! Aka the issue with my Twirling Clamshells pillow.

You have to buy the issue to see all the good stuff!


In true Olympic spirit in honor of the issue, I win a gold medal for that pillow! Because...42 pictures in that pattern people, 42 pictures.

[In case you were wondering if it's worth buying the issue...it's 111 pages. Chock full o' goodness]


PS, I only got 4 hours of sleep last night. I'm a terrible Olympian. And human.


*Linked with Quilt Story


Tuesday, July 3, 2012

Exciting news!

So how fun was the first day of Christmas in July?! Who's already working on some quilted holiday cards or a paper pieced snowflake table runner/wall hanging?! And don't forget that you can enter the giveaway on Jessica's tutorial for a chance at a JOY charm pack!

And now I have some more news!


Back in March I was hard at work in the Pillow Talk Swap, making my partner a pillow of clamshells. I decided to be brave and submitted my project idea to Fat Quarterly [which is oddly nerve-wracking even though it was just over the Internet and not face-to-face with possible rejection]. If you're not familiar with this publication, it's an e-zine run by 5 fabulous quilters, and publishes...wait for it...quarterly. Plus they do bonus editions all the time, like the one out right now, which is focused around the Fat Quarterly retreat that just happened!

So I think that some of the coolest things about Fat Quarterly is that it's online, so you get instant gratification when you want it. Plus it's only $8, and is loaded full of projects. Legit. That's like the price of one regular pattern. But you get MORE patterns. That's math I like to do, people. And even though it's online, you can preview the projects before you buy it! And they put pictures of those projects up on their Flickr. It just gets better and better, amIright?!

So anyways, all gushing aside, my project was accepted a few months ago. Yay!

I've had many people email me and ask for a pattern for the pillow, and I've had to be vague and say no. I felt terrible every time. So here you go, everyone! A pattern! For you to make your very own crazy clamshell pillow.

Issue 10 of Fat Quarterly will be released at the end of July and is all about the Olympics and pageantry and royalty and England. Specifically the theme is "Rule Britannia." I love the Olympics, and I personally know an Olympic runner [she just qualified for the London games yay! Jenny and I ran cross country together in high school and she's the world champion in the 1500 m!], so I think it's a pretty cool theme. 


I re-made the pillow in jewel tones and the pattern comes with probably more pictures then you will ever need to make the pillow cover. In fact, the pattern comes with 42 pictures. And, after sewing the 54+ curves that make up the clamshell part of the pillow, there's no way you won't be a pro. Don't let those curves scare you though, because I walk you through everything nice and easy!


Also, I love all the free-motion quilting that I did! It was so fun!

So, mark your calendars, because I'm sure this will be a super fun issue, even if my project wasn't in it. But since it is, the issue will be that much better ;)

*Linked with Quilt Story

Friday, June 29, 2012

How to Install an Invisible Zipper in a Pillow with Binding!


There are some great tutorials out there on how to install an invisible zipper in a pillow. But those zippers are installed on a seam at the bottom or side of the pillow, and are sewn right sides together and then flipped right-side out.
But what if you like the look of binding on a pillow?
Are your only options either an envelope closure or a lapped zipper [when the zipper is covered with a flap of fabric]?
No!
So in celebration of the weekend, I've prepared a little tutorial on how to install an invisible zipper in a pillow cover. More specifically, in a pillow cover that you also would like to have a binding.

Now, don't be scared. I know that zippers are terrifying for many quilters, and you may have to go slowly at first, but I promise you can do this! In fact, once you get the hang of it, it's so much faster than an envelope closure!


Materials needed:
  •  Invisible zipper [I almost exclusively buy 20-22" invisible zippers]; you do NOT need to shorten it to the size of your pillow
  • Two pieces for your pillow backing - These need to be as wide as your pillow cover front, and then about an inch longer on each piece...for instance, for my 18" pillow I used a 12"x18" piece of Echo and an 8"x18" piece of light gray solid. [12+8=20...an extra inch on the top and bottom]. You can come up with your own measurements, just think about where you want your zipper to be on the pillow back, and go from there.
  • Lightweight fusible interfacing [optional]
  • Not pictured: Zipper foot - I use a regular zipper foot, but if you have an invisible zipper foot then by all means use it
  • Pinking Shears [optional]
  **Note: I apologize for the diagonal line of light across the photos; I was doing this as the sun was setting and no matter how I closed my blinds, it still peeked through.


1. I like to give my fabric a little extra support by fusing some interfacing to the edges where the zipper will be sewn. Zippers pull on the fabric a lot, and this can certainly help! If you choose to do this also, the interfacing should be 2-2.5" wide by the length of your fabric [18" in my case].


2. Iron your invisible zipper. The photo on the left shows the zipper right out of the packaging. The coils are turned under, which is the whole point of an invisible zipper. Using your fingers to help turn the coils to the front, iron the zipper flat. Make sure your iron isn't too hot, because the zipper coils can melt!

3. Decide which of your fabrics will be on top. In the photos, the Echo fabric will be on the top of the pillow backing. Rearrange your fabrics so that the piece that will be on top is on the right, and the other piece is on the left. The fabrics should be right-side up.


4. Unzip the zipper. Place the LEFT zipper tape on the piece of fabric on the right [aka your top fabric]. Pin it so that the zipper side is facing down with a 1/2" seam allowance. The zipper tape should be near edge of the fabric, not the coils. Use way more pins than shown in the photo. You want a pin about every inch or so.


5. Place your zipper foot on your sewing machine. You want to place it so your needle is going up and down on the left side of the foot, as shown in the above photo. 


6. You will need to use both hands to sew the zipper on. Your left hand should be holding the zipper teeth as flat as possible while your right hand guides the fabric through the machine. You need to get the needle as close to the zipper coil as possible. Sorry for the blurry photo! *Helpful hint: If you look at your invisible zipper you will see that the tape has a herringbone pattern to it, and then close to the coils there is no pattern. You want to be sewing in the no-pattern area. 


7. Trim seam down to 1/4" with pinking shears. If you do not have a pair, you can trim down and then zig-zag stitch to keep the edges from fraying. 


8. Take the RIGHT zipper tape and place it face-down on the left fabric. It will seem like you're twisting the zipper and it could never possibly end up ok, but it will. Pin and sew like you did the previous side. Trim with pinking shears or zig-zag stitch.


9. Zip up your zipper and admire your handiwork! Now we need to put some finishing touches on to make it look really great!


10. Iron each side, pressing as close to the zipper as possible.


11. Top stitch approximately 1/8" from the zipper coils on each side. It's easier if you unzip the zipper first.


Note: You'll get better over time at stitching close to the zipper coils even without an invisible zipper foot. The Echo pillow back isn't stitched as close as I would have wanted, but it's hard to tell from a distance. The Silent Cinema backing is much more ideal!


12. Zip the zipper back up. Place pillow front and pillow back wrong sides together. Pin in place.


13. Pin just outside the top stitching on both sides of the zipper. Then unzip a few inches. This is VERY important! You don't want to accidentally sew over your zipper pull when sewing the binding on!

14. Stitch binding to the front of the pillow cover, backstitching over the area with the zipper for added security. Trim zipper ends even with edge of pillow.

15. Turn binding and secure on back with preferred method.

That's it! I know it seems daunting with so many steps listed, but I promise it's really simple. If you have any questions just let me know in the comments and I'll try to address them! Go make yourself an invisible zipper closure! Go on! :)

Monday, June 25, 2012

Topical Storm Sewing

Happy Monday!

I'm over here in Florida, wearing arm floaties, trying to keep my head above water. Seriously. Tropical storm Debby is making it very gloomy over here. Yesterday the entire state was green on the weather map.

BUT. There's only a week left until Christmas in July starts! I hope you're gearing up. And a little birdie told me that there might be a giveaway on the first day ;)

As for in the meantime, I did manage to run outside during the 15 minute break from torrential downpours so that I could take some pictures of my completed Pillow Talk Swap pillow!


I'm still not sure if this is something my partner will like, but hopefully she will at least see that I put a lot of time and effort into making something for her.

 Look! Not an envelope closure! That's progress, people. That is an invisible zipper. Made semi-visible by the fact that it is crooked and a little wrinkly. I think it wrinkled because I used interfacing where the zipper was, for extra strength.


There is a different kind of quilting in each section, each done in a thread to match the section. Gray: pebbles. Green: straight line. Maroon: Free-motion diamonds. White: Free-motion scribbles. Teal: Echo. The aqua section is blissfully unquilted.

I never want to see a pebble again. Like, even in real life. Just the border took me about 2 hours and 3.5 bobbins of thread. I stopped with about 3 inches of empty border space left to quilt, and I almost didn't have the will to do it. Pathetic.

But then there's pictures like this.


And this.


That makes it all worth it. 

Ok, actually, the last picture looks stupid because I don't have a pillow form big enough. But if I did...oh if I did...

*Linked with Canoe Ridge Creations, SewHappyGeek, and Quilt Story!

Wednesday, June 20, 2012

On the process of quilting...

How do you choose your quilting design?


Do you draw on a picture of the quilt/block?


Do you use the quilt motifs that can be found in quilting programs to lay over your design?


Do you quilt what you know/are familiar with?


Do you practice on something else first? [I almost never do that because I have the patience of an ant. As you can clearly tell in the below picture of my remarkably imperfect pebbles]


How do you choose your quilting design?

Tuesday, June 19, 2012

PTS8 Progress

Oh hi!

First off, maybe you all can help me with something. Does anyone else think that the pancakes at Denny's taste like cookies?!

Phew, now that I've gotten that off my chest...


My Nautical Striped Skirt is being a bit of a contest floozie and has made it to finalist status over at the Summer Sewing Contest at Ellison Lane Quilts. Go vote in all the categories! There are some awesome, awesome projects to choose from!

I also did a lot of work on my Pillow Talk Swap pillow last night. A lot more than was necessary. Since I sewed 3 of the blocks together. And then I picked them apart. Ugh. I changed my process of construction up from my trial block to the ones I worked on last night. That was a mistake. It made pieces not line up just right, and that just won't do for something that's going to someone else!

But now it's sewn together, and I really like how it's evolved from my original idea to the finished pillow top:

 Design sketch in Paint and initial fabric pull

Trial block to even see if my templates that I made from my block drawing worked. This is when I added in the magenta, and I'm so glad I did...a great pop of color!

Mock-up in Paint by rotating the trial block


Finished top. I changed the corners out for solid gray because I thought it needed to be "floating" in a border.

After I cut out all the template pieces for the other blocks I made a paper pieced version in EQ5. Of course that would have made it simpler, but I stuck with the templates. Because I'm stubborn like that.

Today I'll be quilting this pillow top. I already definitely know how I'll be quilting the green section, and I'm just waiting for the other sections to show me what they want [you know, like how Michaelangelo always said that he was just uncovering what the marble was always supposed to be...not that I'm comparing myself to him, but I totally get his way of thinking...]


*Final thought - do you host your photos on your blog directly from Flickr or upload them in both places? Is it worth taking the time to do the code and not upload?

*Linked with Fabric Tuesday :)