So what is it about this Washi dress?
That's a question I got last week from someone. And I thought about it and didn't really have a good answer. I'm not sure what made me greatly anticipate the release of this pattern. I think the simplicity of it appealed to me, and as someone who finds the Big Four pattern company patterns to really be lacking in instructions for beginner clothing makers, I was hoping that an independent designer would take more time in the directions.
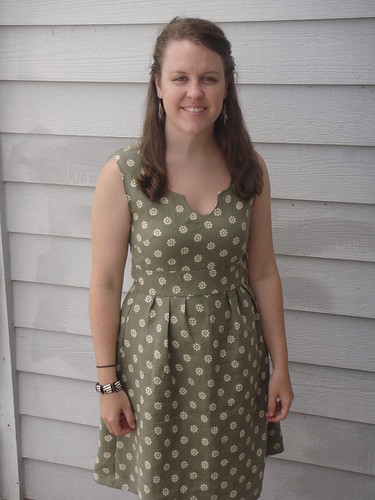
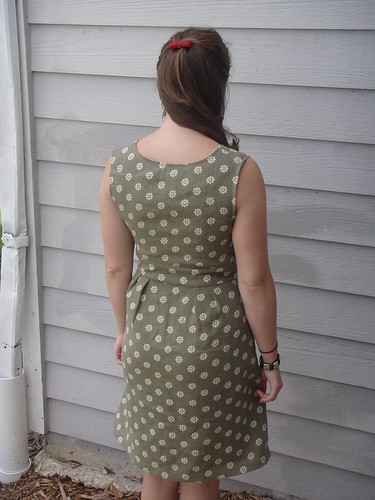
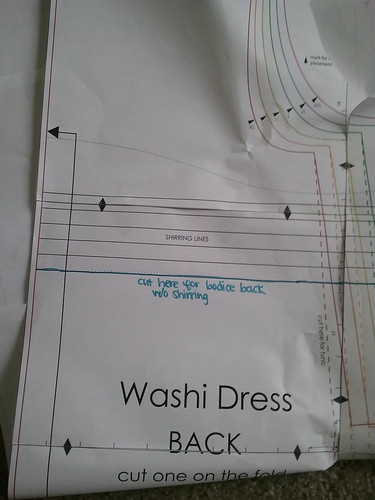
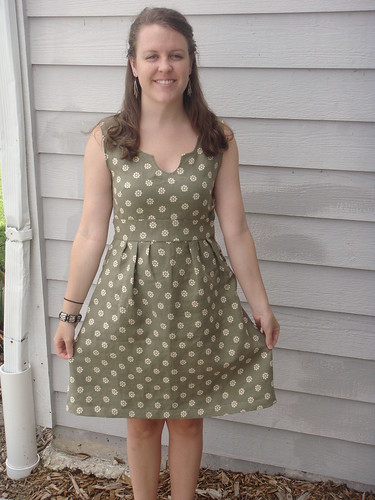
So I cut out the pattern pieces for a size Medium, as that is what best matched my bust measurements. But as you'll notice, I made some significant changes. I wanted to make the dress for a wedding I'm attending next month, and I wanted to use 2 yds of a linen-rayon blend that I bought months ago. I thought that the shirring on the back, while a fantastic aspect of the pattern, would make the dress more casual than I wanted. So I decided to omit the shirring and instead add an invisible zipper on the side seam.
What do you need to do to the pattern to accomplish this?
Cut the back piece as a separate bodice and a skirt. Cut the back bodice at the bottom shirring line. Follow the rest of the markings. I cut the front skirt out again for the back piece...because there's no shirring in the back of mine, I wanted to have the pleats in the back for extra shaping. Make sure that your new back skirt piece is as wide as the back bodice piece, or adjust accordingly. I had to remove one pleat from each side in order to achieve the right width. To clarify, I did not pleat the outermost set of pleat markings on each side of the back skirt.
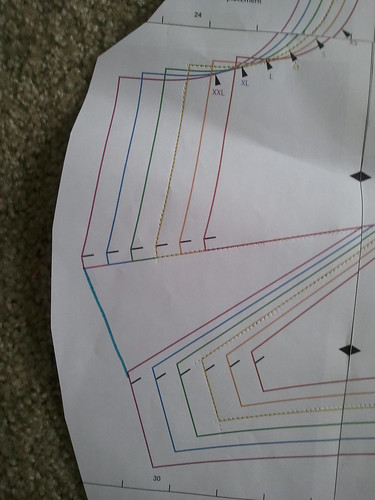
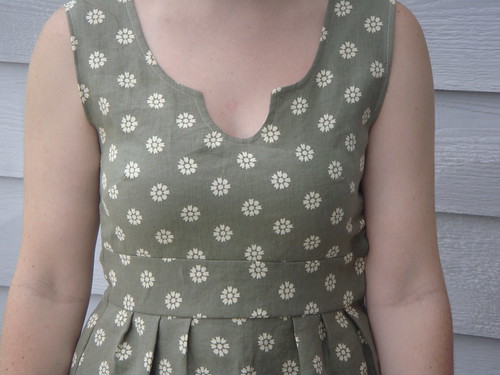
Follow Rae's instructions to make the front of the dress. I also altered the pattern instructions a bit by not cutting into the bodice for the bust darts [see picture of the seams further in the post]. This means that I didn't have to finish the edges of the darts, and it doesn't affect how the bodice lays on my body at all. I also didn't add pockets, because I don't tend to use them in nicer dresses. To omit the pockets you just follow the dotted line down the side of the skirt piece that marks the tunic sides when tracing on your fabric, and just extend it all the way to the bottom.
After I held my pattern pieces up to myself I realized that I didn't like where the bodice hit on me. It hit right under the bustline, and I would have wanted to lower it by an inch or two so it hit more at my natural waistline. However, I had already cut all my pattern pieces. I solved my problem by adding a waistband. I simply cut two strips that were 3.5" wide by the length of both the front and back bodice. I sewed those to both bodice pieces before I continued making the dress.
In order to add the invisible zipper you will simply sew the shoulder seams first, then add the zipper to whichever size you prefer. I sewed the zipper up to approximately 1/2" away from the armhole so that I could finish the armholes properly. Then add a hook-and-eye closure at the very top.
I should have known that everything was going so well that the zipper would be a fiasco, and it sooooo was. I'm actually a pro at installing invisible zippers by now, but you know what I did not once, but TWICE? I pulled the zipper pull off the teeth after sewing the zipper to the dress. I don't think I've ever cursed that much in my entire life. Sailors would have blushed had they heard. Good thing I had 3 zippers on hand...
I chose to finish all the seams I could as French seams, so the inside is the cleanest garment that I've ever made. Woo! You'll notice the seams are pretty wide. I had to remove almost 4 inches from each side of the dress [I didn't make a muslin; I just fitted as I went] and almost 3 inches from the hem [I'm almost 5"3] so I made the side seams wider and the hem deep so that I could have a little wiggle room if necessary. So next time I think I'd make a medium bodice and a small skirt.
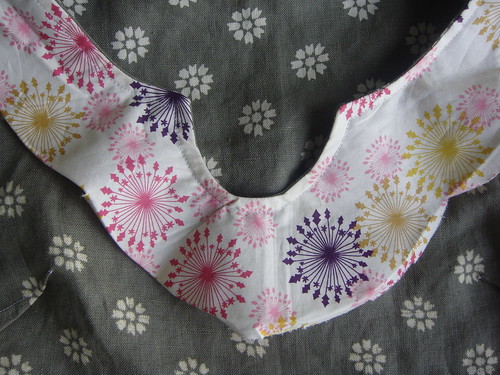
My favorite things about the pattern? The different colors for the different sizes on the pattern is fantastic. Seriously, so helpful! I also enjoyed learning how to make a placket, and it came out really nicely for me! Rae gives a few different options for finishing parts of the project, which is also awesome, because I don't really want to hand-sew on garments if I can avoid it.
Things I didn't enjoy about the pattern? It's pretty vague when discussing understitching the placket to the bodice. I have absolutely no idea what that means, and the pattern didn't give me any clues at all. As a result, my placket is still wiggling free until I figure out what to do with it.



It's beautifuL! And you look great! I love reading your clothing posts because that's something I'd like to tackle in the future. So, overall, props to you :)
ReplyDeleteWow such a great looking dress! I like how you make a lot of your own clothes! The style of it really suits you as well =D
ReplyDeleteYour dress turned out beautifully, Rebecca! It looks wonderful on you, too.
ReplyDeleteAs far as handling that placket, you just need to tack it down to the bodice. Do do it invisibly, make sure both are lying flat and when you take a stitch to secure the placket to the dress, only catch one thread. You can tack it in two or three places and the rest of it should behave itself. I also thought you could use a double-sided lightweight fusible, but I have never done that before. So, I’m not recommending it, just mentioning it. Of course, you would want to test on a scrap first to see if it has any affect on the hand or the look of the fabric. Anyway, you rock! :-)
Oh wonderful! I LOVE how it turned out! And the fabric looks awesome. I will definitely be referring to this post when I make one. I love all the additions and modifications you made, and thank you soooo much for taking the time to explain them. I am so terrified of making clothes for myself, this really helps calm me down.
ReplyDeleteYou'll look wonderful at the wedding! Well done!
Wow, I love the dress you made. Just gorgeous! I haven't had the nerve to try sewing clothing yet, but you make it sound so easy! Someday I'll give it a try. Thanks so much for sharing!
ReplyDeleteIt's adorable. The fit looks perfect! I'm going to a wedding in October and actually have to dress up a little (gasp!), but I think I'll go store bought. ;)
ReplyDeleteIt looks great! I love the neckline.
ReplyDeletegorgeous! I'm so jealous of your talents with the pattern and sewing clothes, i'm totally a space cadet and can't figure it out! once again, fabulous finish!
ReplyDeleteLooks great!! You make it sound so easy too!
ReplyDeleteI love the added waistband, it is so great! Gorgeous dress. :)
ReplyDelete