

Hi everyone! In case you're new here, I'm Rebecca. I'm in my early 20's [with the wisdom of a much older and wiser person, of course] and I live in Florida with my boyfriend. The other day he laughed at me and picked thread out of my hair. In public. Proud moment. And it's a good thing you guys caught me today, because I literally might melt in this heat wave. Even turning the iron on in my sewing room is too much heat lately.

I'm smack in the middle of hosting Christmas in July right now, and we have had some awesome tutorials, so go check them out [those were the links to all 4 so far]. If you participate and make a holiday item by the end of July, we're having a linky party with a chance at prizes!
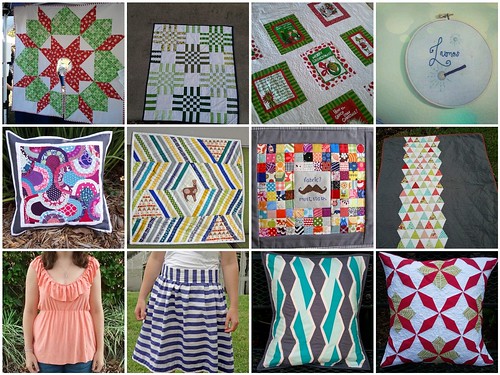
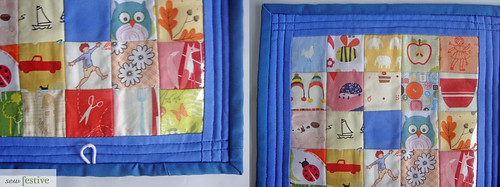
And these [plus the 3 in my header] are a few of my favorite projects:
Beth came up with some questions to prompt us during our posting day, but I've decided that might bore the people who put up with me on a regular basis. Instead, I've got a few fun [I think] facts about me:
1. I have a grand total of 2 UFO's; one was the first project I started making when I taught myself to sew about 4 years ago, and the other is the first quilt I made last summer when I became obsessed with modern quilting.
2. I was held at gunpoint for 30 minutes when I was 18 at the Arby's that I worked at. My manager and I opened the store every Sunday, and the store was robbed and then we were locked in the freezer.
3. I've had a beer thrown in my face by an angry girl [it was unprovoked; I was out with coworkers and the girl was an ex-girlfriend of someone and I just happened to be the unfortunate person standing in the wrong spot]. It was like I was in a soap opera.
4. I think I've only worn shoes while sewing like once or twice. I just can't do it. On a similar note, sometimes when making clothes, I sew in my skivvies because it's easier for fittings.
5. Favorite blogging tip? I set up posts if I have free time. Sometimes I know my schedule will get really rushed, so if I have an afternoon that I'm just sitting and watching a movie I'll type up some blog posts about projects that I'm working on, so then I just have to go back and add in the pictures later. Since blogging takes so long, this helps me out in the long run.
6. I am a fairly talented artist [it's so hard to sound humble online since you have to describe it somehow!]. I have a deep abiding love for charcoal drawings. Maybe one day I'll post some of my work.
7. I could talk for hours about the discrepancies in the juvenile justice system between boys and girls, and the failure of the system to take into account the fact that girls offend for different reasons than boys. It was my passion during grad school.
8. My family is German [and I was born there] and I make a killer spaetzle from scratch.
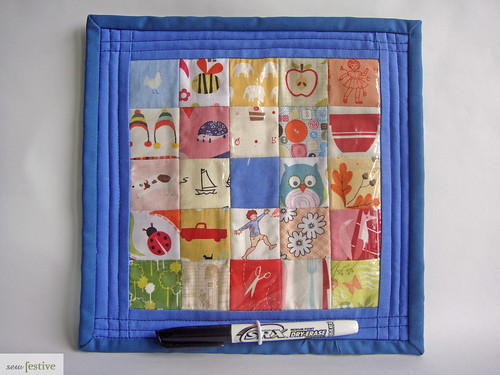
Alright, now on to the good stuff! Beth challenged us to make projects with novelty prints. This truly was a challenge for me, as I don't have kids or sew for kids, so have very few novelty prints on hand. The majority used in this project are from scrap packs I've purchased here or there. But I made it work with the teeniest bits I had. Also, I sewed most of this at night, so bear with the photos.
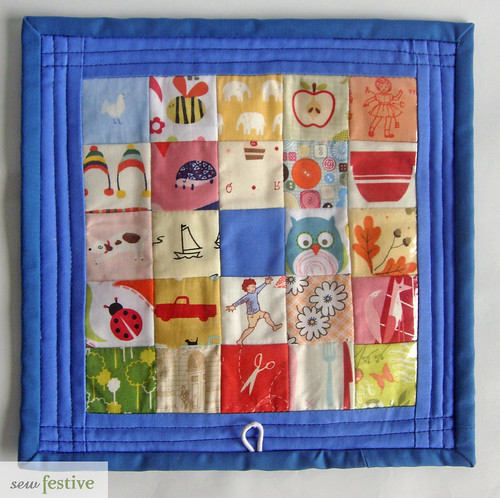
I present...
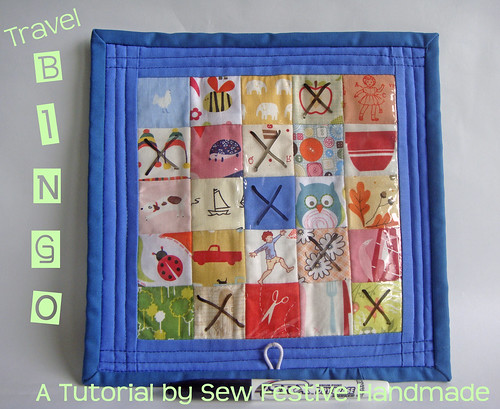
The tutorial will give you supplies needed and instructions to make a single Bingo card. You can then multiply that for however many cards you will need. I recommend at least a set of 4.
*This tutorial is for personal use only.
*This tutorial is for personal use only.
*Please read through entire tutorial before beginning!
Supplies:
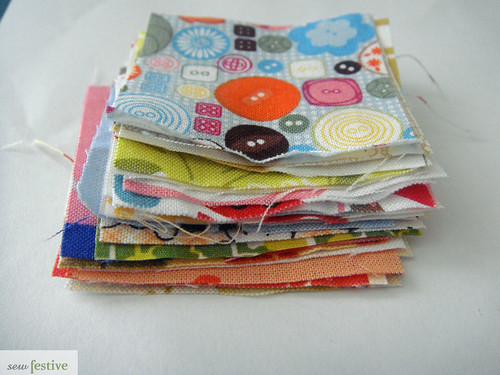
- 24 squares that are 2"x2". These need to have an item on them that can be found while playing travel bingo, ie, trees/dogs/food/etc. See my card for some examples. [You may be really tempted to put HR gnomes in your bingo card, but that would be a little cruel to your child unless you're willing to count lawn gnomes or the Travelocity gnome]. Try not to use prints that have an extremely dark background.
- 1 square of a solid color that is 2"x2". Do not use a really dark color.
- 2 strips of solid that are 1.5"x7.5"
- 2 strips of solid that are 1.5"x9.5"
- 7.5" square of clear vinyl - I got mine at Joann. It's found in the home dec fabric section on those giant rolls, and comes in different thicknesses. I got the cheapest kind that was like $2/yd [a yd is really wide, so you can ask for them to cut you a 7.5 in piece and make a ton of bingo cards with it]
- 7.5" square and 11" square of fusible interfacing - At least medium weight, but the stiffness preference is up to you. I opted for a really stiff interfacing to give my card a little more strucure
- 12" square of batting [or I bet fusible fleece would work well!]
- 11" square of backing fabric of your choice
- 45" of binding
- Scrap piece of elastic or an elastic hair tie [at least 1.5" long]
- Regular sewing notions [ie, thread, scissors, rotary cutter and mat, etc]
*All seams are 1/4" unless otherwise noted.
**Finished size of card is 9.5"x9.5"
**Finished size of card is 9.5"x9.5"
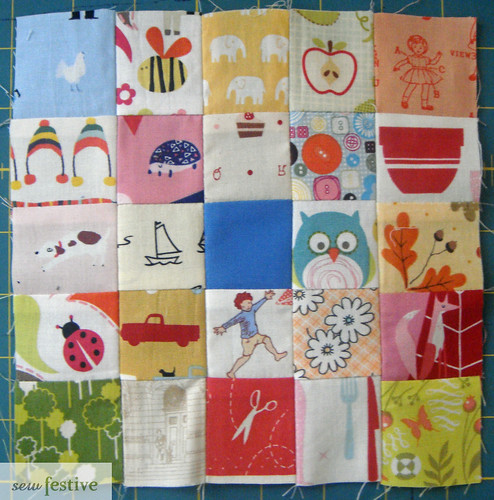
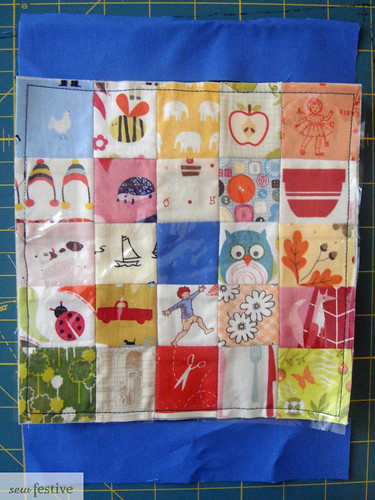
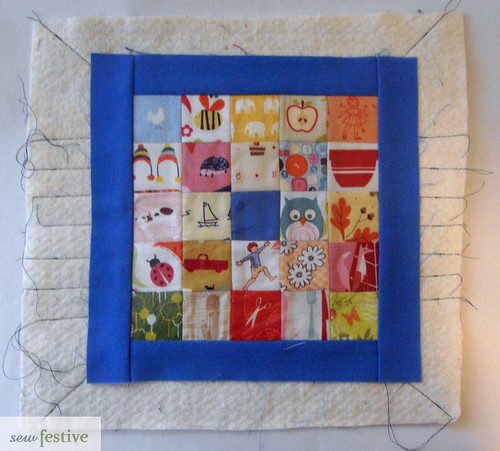
1. Make sure all your fabric squares with the prints on them are small enough that they will fit within the square. They will be 1.5" finished squares. Also, try to ensure that if there are multiple prints on the fabric that it's at least the same item within the square [see the elephant square below]. You don't want to confuse the player!
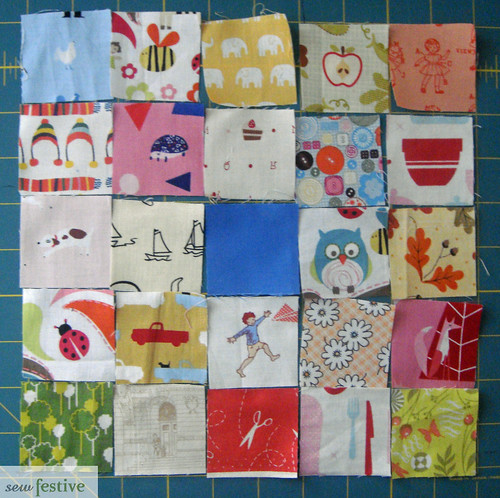
2. Lay out your squares in your desired 5x5 set-up with the solid square in the middle. The solid square represents the "free" space that is on every bingo card.
*Note: if you're making more than one card, you can choose to have all
the same prints in each card [or not], but make sure that they're not in
the same arrangement for each card. You can also use different "dog"
prints across cards, etc, if you don't have enough scraps of one print.

3. Sew squares together in rows. Press seams to the side, alternating which side they are pressed to with every row.
4. Sew rows together. Press seams open. Your square should measure 7.5" on each side.
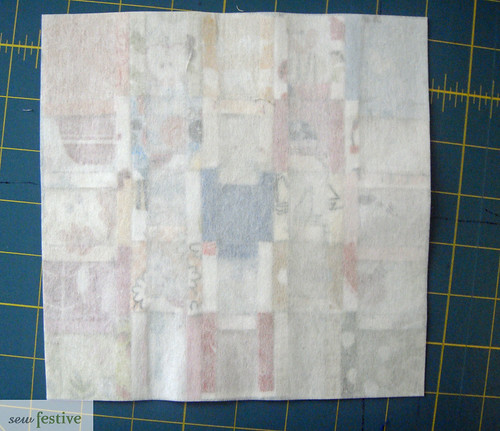
5. Fuse 7.5" square of interfacing to the back of the patchwork square, smoothing to decrease bubbling. Make sure you read the instructions that come with the type of interfacing you are using.
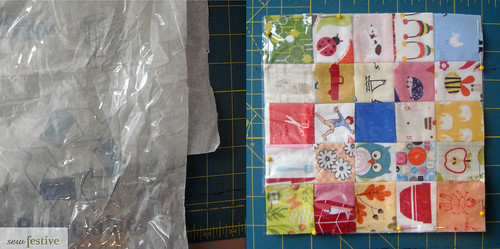
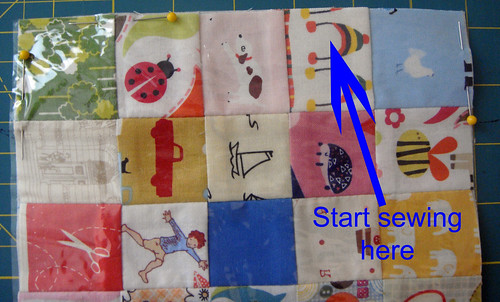
6. Pin the square of clear vinyl to the top of the patchwork square [just peel the paper off the backing of the vinyl before use]. The pins will leave permanent holes in the vinyl, so pin within the 1/4" seam allowance. Leave one section open so you can start sewing.

7. Set your needle at 1/8" and sew completely around the square, securing the vinyl to the patchwork. Note: this will really dull your needle, so feel free to do this with an older needle! Sew slowly because the vinyl is slippery. Make sure you are smoothing after each side you sew to accommodate any shifting that may have occurred.
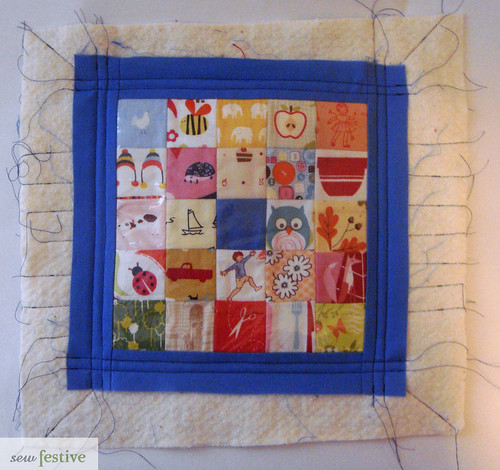
8. Sew the 1.5"x7.5" solid strips to the top and bottom of the square. I pinned the strips at the top and bottom of each side, within the seam allowance, to secure them, but there is much less shifting with the fabric on top of the vinyl. Sew strips with a 1/4" seam allowance. Press seams out toward the edges. IMPORTANT: The vinyl WILL melt if you place an iron on it, so press from the BACK of the square, using a synthetic setting on your iron. Then press from the front, making sure that the iron is only touching the solid strips that you just added.
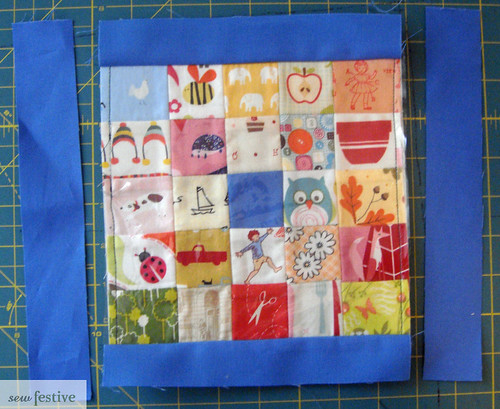
9. Sew the other set of solid strips to the sides of the square. Repeat same pressing process as outlined above.
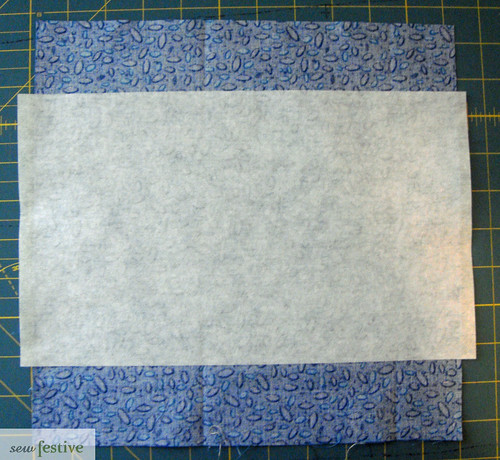
10. Fuse 11" square of interfacing to the backing fabric. I didn't have a big enough piece of interfacing, but don't be like me!
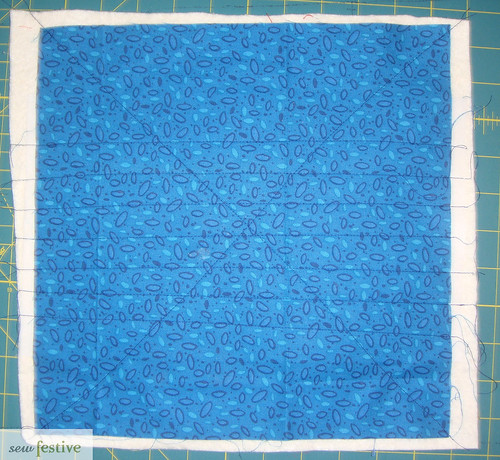
11. Place backing on batting. Quilt as desired. You will be quilting just through the backing and batting. [I just eyeballed my quilting lines; this step is for extra stiffness and stability in the finished product]
12. Place top on batting and baste as desired. If you pin baste remember to not pin in the vinyl section.
13. Quilt in border section. Trim batting flush with border pieces.
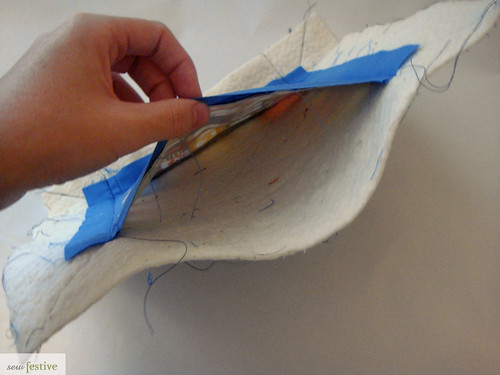
*Note: After I had quilted around 3 sides I realized that I could slide some template plastic or cardboard into the "pocket" before quilting the 4th side in order to make it even stiffer [this is only possible because we're quilting the top and the backing separate]. I didn't have either of those items, but feel free if you do. If you do that then just cut the insert about 7 1/8" square and pop it in. Then quilt the 4th side!
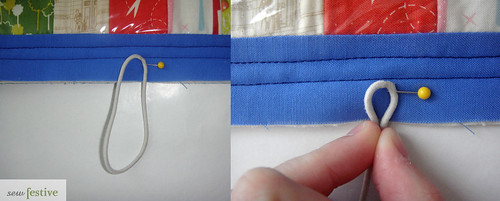
14. Take scrap piece of batting or hair tie and pin at the bottom center of the front of the bingo card [where the vinyl is]. Pin in place with ends sticking out into the seam allowance. Pinch together if necessary so the ends are together when you sew over them. There should be just about 1" making up the loop. If you plan to use a smaller marker, take that into account when sewing down the elastic.
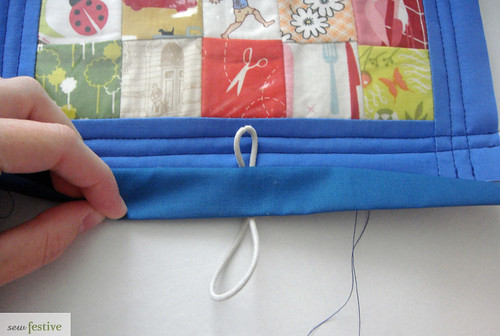
15. Sew binding to front of bingo card, backstitching several times over the section with the elastic. Trim elastic so you can fold the binding over.
16. Sew binding to the back of the bingo card using preferred method.
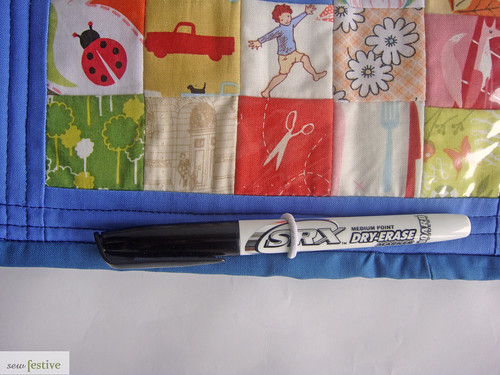

Voila! You have a reusable travel bingo card! Use a dry erase marker to mark off the squares [and the elastic provides a convenient place to store the marker!] and it wipes right off for the next time you want to play, no water or cloth necessary!
"Well, Rebecca, what do I do with this bingo card?"
Ideas for playing:
- Let your kids help pick out the fabric for their own card. Fun!
- It might also be a good idea to go over the card with them the first time if they're young, so that they know what the illustration in each square is supposed to be.
- You can play it I-Spy style in the car or at a destination; when you see something on your card you cross it off and first person to fill a row/column/diagonal wins.
- You can play more traditional bingo style and either write down on paper what's on the cards and draw out of a hat, or you can cut an extra square out of the fabric as you're making it and draw that out of a hat to call out the "numbers".
"But Rebecca, what if I don't want to subject my kids to a terrible selection of novelty prints like your card [seriously, where can I find scissors and cake and elephants at the same place?] because I also don't have many novelty prints?"
Ideas for overcoming a lack of novelty prints:
- Use solids! You can play in the same way by trying to find the colors in your surroundings and marking them off or by cutting out extra solid squares and calling the colors out in a traditional bingo style.
- Use a 7.5" white fabric square and draw or sew a grid on it and let your kids draw their own pictures in each square! Then carry on with the tutorial in the same way.
I hope you consider making some of these! Please let me know if you have any questions :)
Such a cute project! I also love your Must Stash mini and the curvy pillow - both are so awesome! Great tip also on writing up blog posts ahead of time - I should totally do that. So nice to meet you :)
ReplyDeleteRebecca, this tutorial is brilliant!! I desperately want to make these for my girls when I have the time. Thanks so much for sharing!
ReplyDeleteNeat idea!
ReplyDeleteNice use of your novelty prints!!! Great to get to'know' you more too!!
ReplyDeleteVery fun! I so would have made these when my kids were young!
ReplyDeleteGuten tag :)
ReplyDeleteI have never worn shoes when I sew and I cant imagine wearing shoes in my house.
Good idea! Nice tutorial!
ReplyDeleteAWESOME tutorial!
ReplyDeletethat is such a great tutorial! thanks for sharing! btw, I have been hard at work on my Christmas projects, I can't wait to link up!
ReplyDeleteIf you want to make one for grown ups use solids and car company symbols - a purple Porsche (unlikely I know), a yellow Toyota (you get the idea) ...
ReplyDeleteLove your blog and your bingo tute :)
ReplyDeleteSuch a fun project - great idea. It would be great to see your drawings some time!
ReplyDeleteThat is such a cute project! I'm sure my kids would love it for the long roadtrips that we take to visit grandparents. I've been working on my Christmas projects too, but I've got nothing completed to show for it yet. Soon, hopefully.
ReplyDeleteIt is crazy to have drink thrown over you! Wow held at gun point even scarier..I haven't been, but I have been closed in a freezer before!
ReplyDeleteGreat tutorial! Such a fun idea, for children or adults! =D
Hi Rebecca, nice to meet you. This is a fun tutorial. I'm plannig my Christmas projects. hopefully I will have something finished to participate on your link party.
ReplyDeleteThis is such an awesome idea, Rebecca!
ReplyDeletegreat project rebecca! I like the i-spy vibe you and I are working with in this blog hop - great minds think alike!! :)
ReplyDeleteNice to meet you! Cute idea and great tutorial, and you make spaetzle from scratch -- killer spaetzle - wow! Always wondered how that is made, had when I visited Germany :)
ReplyDeleteHey Rebecca! I've been following you for a couple months but nice to learn more about you!
ReplyDeleteLovely to meet you :) I like your bingo card. And I think pre-writing blogs for busy times is great advice!
ReplyDeleteMy children would love this - it's a great idea. Nice to meet you via the Hop!
ReplyDeleteGreat tutorial and, as I don't have little ones, I like Leo's idea to adapt it with plain fabric and car symbols also. It was good to hear your 'alternate' q&a! Good to meet you on the blog hop :)
ReplyDeleteThis is such a fun idea! I love it! That's for the fantastic tutorial!
ReplyDeleteIt was nice getting to know you better, Rebecca! Your bingo card is a great idea and so wonderful for teaching kids different things.
ReplyDeleteThis is such a great idea! Thanks for the tutorial. :)
ReplyDeletePopping over from Plum and June - nice to meet you! Very inventive use for novelty fabrics!
ReplyDeleteHi Rebecca, nice to meet you. Your car bingo quilt is a great idea. My kids are past that now but we used to have bingo cards in the car for long trips.
ReplyDeleteThis is awesome, Rebecca. We're heading on a road trip in a few weeks and I think this would be a perfect activity for the car. Great idea!
ReplyDeleteYou make some awesome fun projects Rebecca. Thanks for sharing. I do hope you recieved some professional councelling after being held at gunpoint. I hope it doesnt haunt you still such a horrible experience. Hugs!
ReplyDeleteHi There, lovely to meet you and this is a fab idea!
ReplyDeleteThis is adorable!
ReplyDelete