

A tablet cover! My sister had a tablet on her Christmas list, but found one at a bargain on Black Friday. So she changed her request to accessories for her new tablet.
Now, there are plenty of tutorials for covers for Kindles and Nooks and even iPads. But a Samsung Galaxy S Note? None. So I pulled up the Kindle cover tutorial over at Whipstitch, and I pulled out my math skillz. The one downfall of this is that Deborah doesn't list the Kindle's measurements that she starts with to create her cover. So I was really just winging it to know what kind of ease she was working with in her pattern. Here's to hoping it all worked out okay.

Pros:
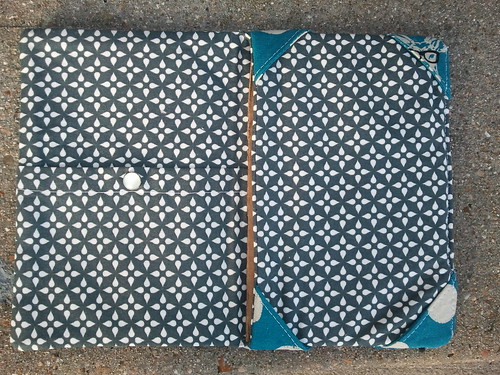
- I specifically wanted a cover that my sister could be using her tablet while still protecting it, and not just a sleeve for travel, so this tutorial was perfect
-It didn't require any crazy interfacing or materials that I didn't have on hand
-It's pretty customizable, and I'm not talking about different tablets, I'm talking about extra pockets, etc
-The pocket behind the corner tabs allows for extra security when the tablet isn't in use [the cardboard in the above photo is my makeshift tablet to test my math]
Cons:
-The pattern as it was would come out to be a little "floofy" to be a good cover, in my opinion
-At one point in the construction you would have been sewing the inside piece, the corner pieces, the elastic, the batting, and the outer piece together. That's a lot to hope doesn't wiggle around, even with careful pinning.
Things I changed:
-I quilted the batting to the outer piece of fabric. I interfaced the Echino as well, but I wanted it to be more stiff, and knew that quilting would help. It was super helpful when sewing all the layers together that the batting wasn't going to shift. Plus, hello, cute!
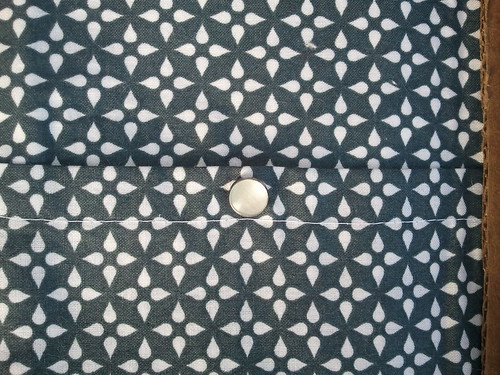
-I added a pocket on the left-hand size by simply cutting some Washi to the length of the entire piece, folding the top edge over twice and top-stitching. I added a pearl snap for extra security in case she wants to put headphones in it or something.
-I made a sleeve for some template plastic, and slid it in the pocket in the middle to give the whole thing extra support. Kind of like what you do for the bottom of bags. I actually tried to sew the plastic into the back of the middle piece where the corners are, but it just wasn't working to be able to turn the entire thing right-side out at the end, so I gave up and re-improvised.

Things I would change if I did this again:
-The corners were a bitch. There's just no other way to say that. As you can see in the above photo, it's still a little wrinkly...I might try to redo it again. There's just so much going on in those right-hand corners. So I decided I would extend the cover by a strip about an inch wide on that side, allowing the corners to be sewn into that strip, and then forming a new corner to be turned right-side out.
-Which leads into my next future change...I'm not sure I'm loving the elastic on the outside. I really wanted a magnetic snap, or even the pearl snap like I put on the pocket. Or a zipper if I'm feeling wild. But because the corner tabs are right at the edge of the cover, it doesn't allow for any different closure options.
-I'd add some super stiff interfacing at some point during construction so that it's more comparable to a cover you'd find in stores.
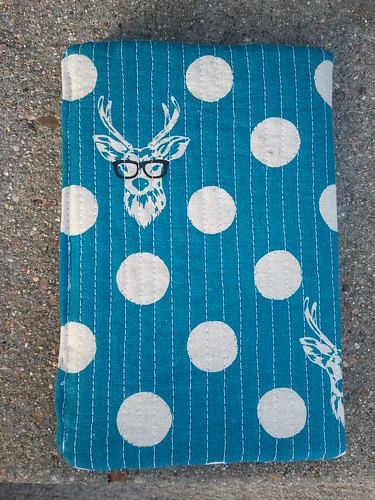
Hopefully my sister likes it!
It came out really cute! Thanks for the tips. I need to make an iPad 2 cover soon so that was helpful.
ReplyDeleteIt looks great! Have been thinking of making something similar for my Kindle, so the tips will be really useful.
ReplyDeleteLooks great! Thanks for breaking down pros, cons, and things you'd do differently. That sort of stuff is so helpful in a post!
ReplyDelete