Showing posts with label tutorial. Show all posts

Tuesday, July 24, 2012

Christmas in July Tutorial Wrap-Up


Christmas in July tutorials are all finished. Sad. But how great were all those projects?! It makes me want to keep sewing for the holidays! It also amazes me that all these wonderful ladies came up with such different tutorials...a great variety of projects!

And make sure you go visit all their blogs because they're constantly producing awesome stuff :)

I wanted to make sure to do a round-up of all the tutorials, so you can access them in one easy location.

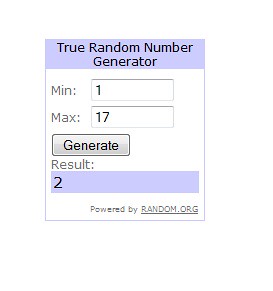
But first things first, the winner of the Thimble Blossoms PDF Stocking Pattern is:
...which is Judith! She makes different stockings every year! I'll be emailing you Judith :)

I will also be updating the Christmas in July tab at the top of my blog later tonight with links to all of the tutorial posts, so you can easily access which one you want to make!

Remember, the linky party opens next Monday July 30th and will remain open until Friday August 3rd. There will be multiple categories, but you can only link one official entry per category for prize purposes. There's one prize per category, plus a prize for a random winner out of all the people who choose to share projects! Your project must be a completed item to be considered a valid entry!

So you still have plenty of time to make some holiday items for a chance to win some fabric :)

Maybe one of the tutorials from the past month?...


Tuesday, July 17, 2012

More tutorials! More fun!


 Just popping in to say that I have a tutorial up at Cut To Pieces for her Sew-Less Summer Series [wow that's a mouthful!] today. Angela just became my favorite person in the world because she said in her post that she has hair envy...I died. Seriously. Made my week lol!


I know, I know, I'm almost out of control with the number of tutorials I've churned out in the last month. But this one is so easy because it requires NO sewing. But still uses yummy fabrics! Yay! Go check it out :)


*Linked to Quilt Story!

Monday, July 16, 2012

Christmas in July - Stacking Gifts Wall Hanging


This afternoon's Christmas in July post is brought to you by Kelsey. She just finished up this bright bit of quilting, and I love love love her On a Whim quilt. She was also part of the Let's Get Acquainted Blog Hop, and wrote up a great tutorial on how to upcycle dress shirts into a dish mat, which is so useful [I love useful sewing, it makes Stephen less grumpy about thread all over the house!]
________________________________________________________________________

Hi Everyone!  Are you feeling festive?!  I’m Kelsey from Kelsey Sews and when Rebecca asked me to join the Christmas in July event I was so excited!  I’ve had the idea for this wall hanging bouncing around in my head for a while and this was the perfect chance to make it happen.

Stacking Gifts Wall Hanging

Materials:
  • White (or other neutral background/sashing fabric) – 1/4 Yard
      Cut into 3 strips 2.5” x WOF, then subcut as follows:
      • 2 Strips 32.5" x 2.5”  *I left mine 2.5" x WOF and trimmed after attaching*
      • 3 Pieces 4” x 2.5”
      • 3 Pieces 2.75” x 2.5"
  • Prints – There are three gifts which you can choose to make from one, two or three prints.  This fabric is the “wrapping” on the gifts.  I used two prints for my sample in the pictures.  I won’t quote yardage since it depends on your choice (and you don’t need much!) but you’ll need the following pieces for each gift block
    • 2 Pieces 6.5” x 3.75”
  • Coordinating Print (or Solid) – This will be for the ribbon & bow of the gifts.  You will need 1 Fat Quarter or 1/8 Yard.  Cut into the following pieces:
    • 3 Pieces 6.5” x 2”
    • 6 Pieces 2.5” x 2.5”
  • Backing1/2 Yard or a piece approximately 35 x 15 (allows for overages when basting)
  • Binding1/4 Yard or 100 inches of 2.5” strips

* I used 1 Fat Quarter for my solid pieces as well as my binding and I had exactly enough, so that’s an option*
Fabric Pieces

Instructions:
**All seams are a scant 1/4” and all seams are pressed open**

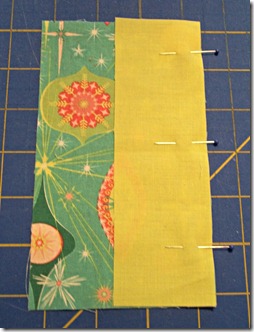
1. First we will make the body of the gift.  You’ll need your print pieces and the 6.5” x 2.5” piece of your coordinating print/solid.  Pin the 6.5” side of the thin strip, right sides together, to the 6.5” right hand side of one of the print pieces.  

Step #1

2. Sew and press seams open.  Attach the second print piece to the other side of the thin strip.  You will end up with a piece that looks like this: 

Step #2

3. Next we’ll make the bow for the top.  You’ll need:
      • 2 of the 2.5” x 2.5” pieces of your coordinating print/solid
      • 1 of the 4” x 2.5” pieces of white/background
      • 2 of the 2.5” x 2.75” pieces of white/background
Start by drawing a diagonal line across the back of each of the 2.5” x 2.5” squares. 


4. Take one square and match it, right sides together, to one side of the 4” x 2.5” piece.  Pin, and sew on the line you’ve drawn.


5. Then, using your ruler & rotary cutter trim the outer corner off, 1/4” out from your sewn line.  Press seam open. 


6. Once you’ve pressed the seam open you can place the other square on the other side (opposite edge of where you just attached to) and pin.


7. Sew on the line, trim and press.  This will resemble a flying geese piece but the point is more than 1/4” away from the edge.  It should look this way – you didn’t mess up!


 8. Now attach the 2.75”x 2.5” white pieces to each side of the bow you made in step #2, matching the 2.5” sides together.  You should now have a strip 2.5” x 8.5” (trim if necessary).


9. Attach the bow to the top of the gift so that the point of the white triangle is closest to the gift.  Your block should look like this:


10. Repeat steps #1-9 to make the remaining two blocks

11. Once you’ve made all three blocks we’ll need to sash them together.  I didn’t take any pictures of this but here’s how I did mine.
  1. Lay your blocks in the order you want them.  Top, Middle and Bottom. 
  2. For the top block take 2 of the 2.5” x 8.5” white strips.  Attach one to the top and bottom of the block
  3. Then attach the middle block to the sashing strip on the bottom of the top block
  4. Next add an 8.5" x 2.5"  sashing strip to the bottom of the middle block
  5. Add the top of the bottom block to the sashing strip on the bottom of the middle block
  6. Finish by adding an 8.5" x 2.5" sashing strip to the bottom of the bottom block
*A Tip – I cut my strips longer than 8.5” (probably closer to 10), attach them all, and then trim down the whole side at once.

12. Now that the blocks are all sashed together into one long strip you can add the 32.5” x 2.5” strips to each side. Use the same tip as above if you’d like.


Yay!  A finished wall hanging top.  Now you can baste, quilt and bind however you’d like.  I quilted mine with some all over loops and used the same solid as my ribbon/bows for the binding. 

When attaching the binding you may want to add a sleeve or some tabs so you can hang your project.


I used this excellent tutorial to make little corner pockets on mine.

I hope you make one of these this year!  They’d make a great gift (or a present for yourself!).  You can adjust the pattern to suit your needs as well.  Make a few more gift blocks to increase the length, make one block and turn it into a potholder, or sash the blocks together along their sides and turn it into a table runner.

Merry Christmas & Happy Holidays!!
Kelsey 
______________________________________________________________________________________________

So, so, so cute! And I love the retro fabric! I think I'll make one and have the presents running horizontally and hang it over my couch. How adorable would it be to make the presents as individual blocks and sew them into reusable gift bags? Get it, a present on the outside and a present on the inside? I kill myself sometimes.

Thank you so much Kelsey, this is a fabulous project that I'm sure many people are adding to their to-do lists!

 We only have one Monday left of tutorials, and 2 weeks until the linky opens up for you to show off your holiday sewing! For a little extra incentive, today's giveaway is a quick project that you can totally finish in 2 weeks:


The winner will receive one PDF copy of the Thimble Blossoms stocking pattern pictured above. Awesome! I had a handmade cross-stitched stocking growing up and loved it, so make your family some stockings of their own!


Requirements to enter:
  • You have until 12 pm EST on Monday July 23rd to enter. I will announce the winner on Tuesday the 24th.
  • This giveaway is open to anyone, anywhere
  • You must have a valid email address, and if it's not listed in your profile then it must be listed in your comment
So how about this time you tell us the best present you've given or received. Good luck!


Christmas in July - Fussy Cut Pillow


Good morning all! First up for today's Christmas in July tutorials is Bianca. It seems like this lady never takes a break - she's run a Retro Flowers QAL and a Patchwork Prism QAL in the last several months! They're both over, but go take a look at the posts if you're looking for inspiration/courage to make quilts with non-square shapes.
__________________________________________________________________________________
Hi! I'm Bianca from Sweet Diesel Designs and I am thrilled to be participating in Rebecca's Christmas in July. Isn't it so hard to believe that the holidays will be amongst us in just a few short months?! Shortly after Rebecca asked if I would make a little something, I got a nice "treat" in the mail and inside just happened to be some Christmas fabric of Tina Givens' new line, Star Flakes and Glitter. After playing around a little with some ideas, I finally landed on making a pillow with an envelope enclosure...which can be whipped up with any block or design in just a few short hours. Plus, more than likely you already have a pillow form around the house...no trip to JoAnn's and you have 'spiffied' up your house in a few simple steps. :) So here we go... 

Materials:
  • fabric for your pillow top {keep in mind how you like for your pillows to look...really stuffed or not so much...this will make a difference in what size your finished pillow top and the backing need to be. I like a stuffed pillow, so I made my pillow top the exact size of my 18" pillow form and sewed it together with a 1/4" seam allowance .}
  • fat quarter for the backing unless you are using a 24" X 24" pillow form
  • batting {just a little bigger than your pillow top and back}
  • muslin {just a little bigger than your pillow top and back}
  • steam-a-seam
  • and the usual...rotary cutter, mat, matching thread


1. You first need to decide what size pillow you would like to make. {14" X 14", 16" X 16", 18" X 18"...or stuff one and make it whatever size you want to} I made an 18" X 18" pillow. 2. Choose your design. I chose to fussy cut the polar bears with their own 'border' and let them shine by doing a simple border in 2 other fabrics. My center is 12" X 11 1/2".


2. I then cut 2 strips of my grey solid, 1 1/2" X 12" and sewed each piece to the top and bottom of my fussy cut polar bear center.


3. Next, I cut 2 strips of grey for the sides, 1 1/2" X 13 1/2". Remember that when you are cutting your strips for the sides to include the measurements of your top and bottom strips. {You may find it easier to cut the strips as you go.}


4. Added on the pink poinsettia fabric border, 2 1/2" X 13 1/2" for the top and bottom and 2 1/2" X 18" for the sides.


**This is where the 'way you like' your pillows to look is important. For my 18" X 18" pillow I made my pillow top exactly 18" X 18" and took a 1/4" seam allowance. But if I didn't want my pillow to be as snug, then I would have made it 18 1/2" X 18 1/2" to leave room for a 1/4" - 1/2" seam allowance. 

5. At this point I made a quilt sandwich with batting and muslin.


{I only folded back the batting to show you that the muslin was on the bottom.}
6. I quilted my pillow top in the ditch of my borders to keep it simple using a light pink Aurifil thread. Once that was complete, these perfect little squares were made at the corners of the grey fabric, so I decided that they needed a little embellishment. I made french knotted 'snowflakes' in each corner with variegated purple and pink embroidery floss.


7. Next begin working on your envelope backing. Cut 2 pieces from your fat quarter measuring 18" X 12". On one 18" side of each piece, you must make a hem. I like a finished double hem. I cut 2-18" pieces {for each backing piece} of steam-a-seam and placed it right up against the edge.


8. Then used my iron to set the fusible side to the wrong side of the fabric and peeled away the paper lining.


9. Using steam-a-seam helps to create a perfect 1/4" hem...it takes the guessing out of it and speeds up the process. Just fold the edge over and set with the iron.


10. To create a finished double hem, fold over 1" {or however big you like your hems}. Press and topstitch 1/8" from the top of the fold. {I use my edgestitching foot.}


11. Repeat steps 7-10 for the other backing piece.
12. An envelope closure overlaps in the back by 3"-6". You decide what you like just making sure that you cannot see the underneath hem once the pillow form is inserted.


{I pin my flaps together so that they do not move when I am sewing the top and back together.}


13. Pin it right sides together and sew 1/4" - 1/2" seam. {For an envelope closure you do not have to worry with making sure that you leave a hole to turn it right side out...one reason why I like envelope closures. :)} Turn right side out, really working on the corners. You can even clip the corners {on the wrong side} at an angle to get rid of some of the bulk if you need to.


14. Stuff your pillow form inside and voila...


Here is a picture from the back...


**If you are making a a non-standard size pillow and stuffing your pillow...you would sew up all 4 sides but leave a hole on the bottom to be able turn it right side out. Stuff your pillow. Then either hand stitch the closure or sew extremely close to the edge where it is nearly invisible. {I prefer to hand stitch my closures.}
And there you have it...an easy and quick way to decorate for the holidays or any regular old day for that matter!
Thanks Rebecca for letting me pop over to share...this was fun!
__________________________________________________________________________________

How cute are the polar bears?! I love seeing peeks of new fabric! This is a great project for fussy cutting a fabric, and is a really great project if you just want to buy a small bit of a focal print. And I've never thought to use Steam-a-Seam on a hemline. Thanks Bianca!

Tell us in the comments what you've been working on for the holidays!

Wednesday, July 11, 2012

The Let's Get Acquainted Blog Hop! and a Tutorial


Hi everyone! In case you're new here, I'm Rebecca. I'm in my early 20's [with the wisdom of a much older and wiser person, of course] and I live in Florida with my boyfriend. The other day he laughed at me and picked thread out of my hair. In public. Proud moment. And it's a good thing you guys caught me today, because I literally might melt in this heat wave. Even turning the iron on in my sewing room is too much heat lately.


I'm smack in the middle of hosting Christmas in July right now, and we have had some awesome tutorials, so go check them out [those were the links to all 4 so far]. If you participate and make a holiday item by the end of July, we're having a linky party with a chance at prizes!

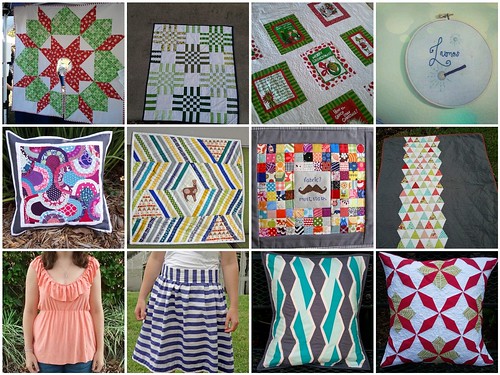
And these [plus the 3 in my header] are a few of my favorite projects:


Beth came up with some questions to prompt us during our posting day, but I've decided that might bore the people who put up with me on a regular basis. Instead, I've got a few fun [I think] facts about me:

1. I have a grand total of 2 UFO's; one was the first project I started making when I taught myself to sew about 4 years ago, and the other is the first quilt I made last summer when I became obsessed with modern quilting.
2. I was held at gunpoint for 30 minutes when I was 18 at the Arby's that I worked at. My manager and I opened the store every Sunday, and the store was robbed and then we were locked in the freezer.
3. I've had a beer thrown in my face by an angry girl [it was unprovoked; I was out with coworkers and the girl was an ex-girlfriend of someone and I just happened to be the unfortunate person standing in the wrong spot]. It was like I was in a soap opera.
4. I think I've only worn shoes while sewing like once or twice. I just can't do it. On a similar note, sometimes when making clothes, I sew in my skivvies because it's easier for fittings.
5. Favorite blogging tip? I set up posts if I have free time. Sometimes I know my schedule will get really rushed, so if I have an afternoon that I'm just sitting and watching a movie I'll type up some blog posts about projects that I'm working on, so then I just have to go back and add in the pictures later. Since blogging takes so long, this helps me out in the long run.
6. I am a fairly talented artist [it's so hard to sound humble online since you have to describe it somehow!]. I have a deep abiding love for charcoal drawings. Maybe one day I'll post some of my work.
7. I could talk for hours about the discrepancies in the juvenile justice system between boys and girls, and the failure of the system to take into account the fact that girls offend for different reasons than boys. It was my passion during grad school.
8. My family is German [and I was born there] and I make a killer spaetzle from scratch.

Alright, now on to the good stuff! Beth challenged us to make projects with novelty prints. This truly was a challenge for me, as I don't have kids or sew for kids, so have very few novelty prints on hand. The majority used in this project are from scrap packs I've purchased here or there. But I made it work with the teeniest bits I had. Also, I sewed most of this at night, so bear with the photos.

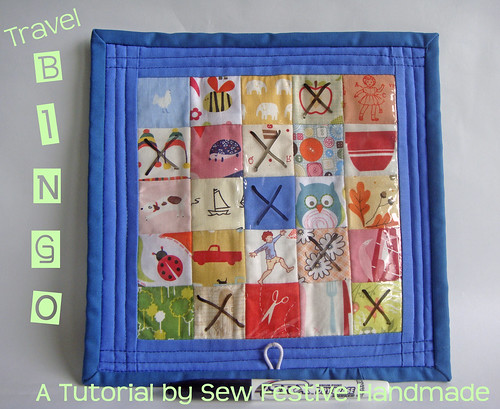
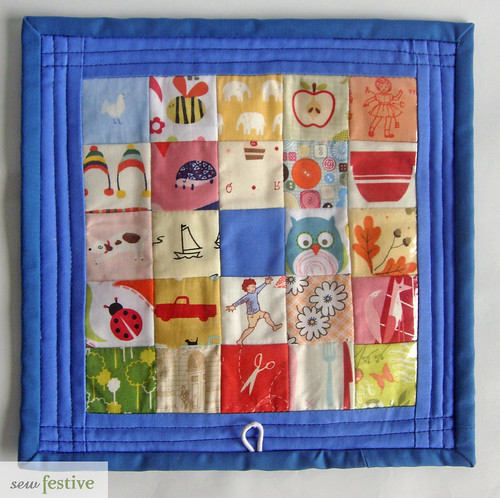
I present...

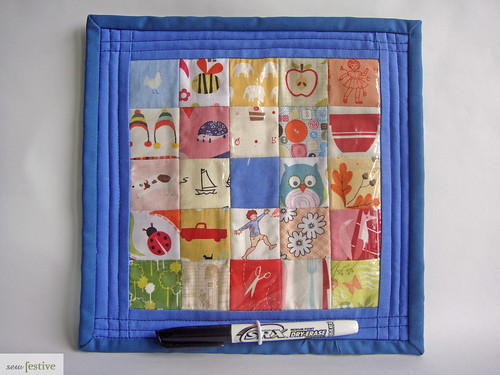
The tutorial will give you supplies needed and instructions to make a single Bingo card. You can then multiply that for however many cards you will need. I recommend at least a set of 4.

*This tutorial is for personal use only.

*Please read through entire tutorial before beginning!

Supplies:
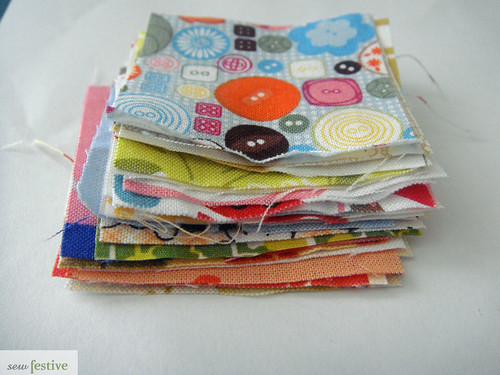
  • 24 squares that are 2"x2". These need to have an item on them that can be found while playing travel bingo, ie, trees/dogs/food/etc. See my card for some examples. [You may be really tempted to put HR gnomes in your bingo card, but that would be a little cruel to your child unless you're willing to count lawn gnomes or the Travelocity gnome]. Try not to use prints that have an extremely dark background.
  • 1 square of a solid color that is 2"x2". Do not use a really dark color.
  • 2 strips of solid that are 1.5"x7.5"
  • 2 strips of solid that are 1.5"x9.5"
  • 7.5" square of clear vinyl - I got mine at Joann. It's found in the home dec fabric section on those giant rolls, and comes in different thicknesses. I got the cheapest kind that was like $2/yd [a yd is really wide, so you can ask for them to cut you a 7.5 in piece and make a ton of bingo cards with it]
  • 7.5" square and 11" square of fusible interfacing - At least medium weight, but the stiffness preference is up to you. I opted for a really stiff interfacing to give my card a little more strucure
  • 12" square of batting [or I bet fusible fleece would work well!]
  • 11" square of backing fabric of your choice
  • 45" of binding
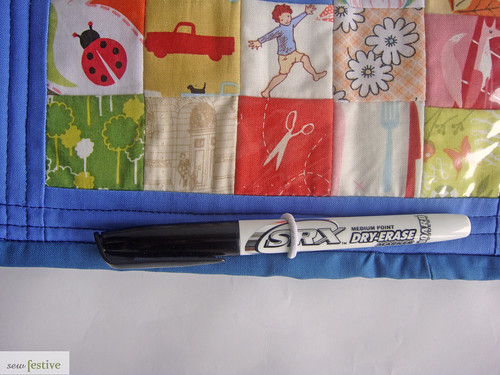
  • Scrap piece of elastic or an elastic hair tie [at least 1.5" long]
  • Regular sewing notions [ie, thread, scissors, rotary cutter and mat, etc]
*All seams are 1/4" unless otherwise noted.

**Finished size of card is 9.5"x9.5"


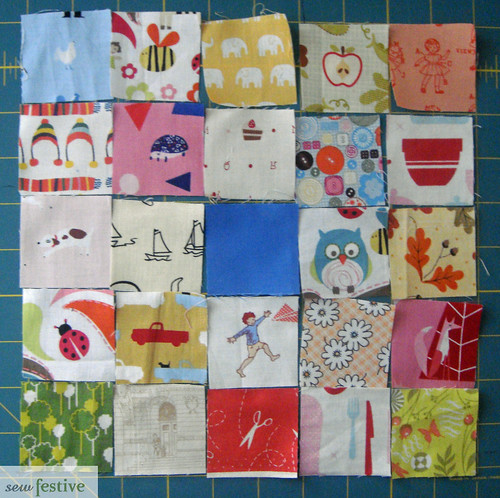
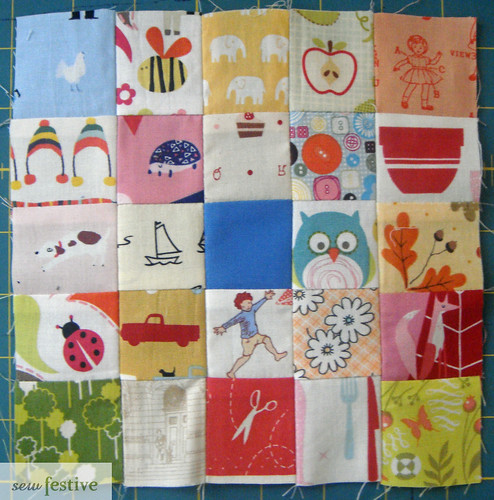
1. Make sure all your fabric squares with the prints on them are small enough that they will fit within the square. They will be 1.5" finished squares. Also, try to ensure that if there are multiple prints on the fabric that it's at least the same item within the square [see the elephant square below]. You don't want to confuse the player!


2. Lay out your squares in your desired 5x5 set-up with the solid square in the middle. The solid square represents the "free" space that is on every bingo card. 

*Note: if you're making more than one card, you can choose to have all the same prints in each card [or not], but make sure that they're not in the same arrangement for each card. You can also use different "dog" prints across cards, etc, if you don't have enough scraps of one print.


3. Sew squares together in rows. Press seams to the side, alternating which side they are pressed to with every row.


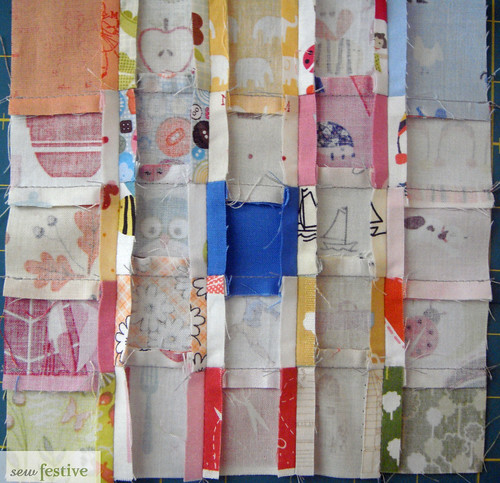
4. Sew rows together. Press seams open. Your square should measure 7.5" on each side.


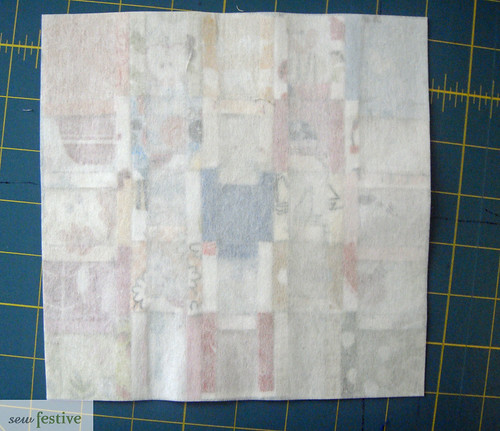
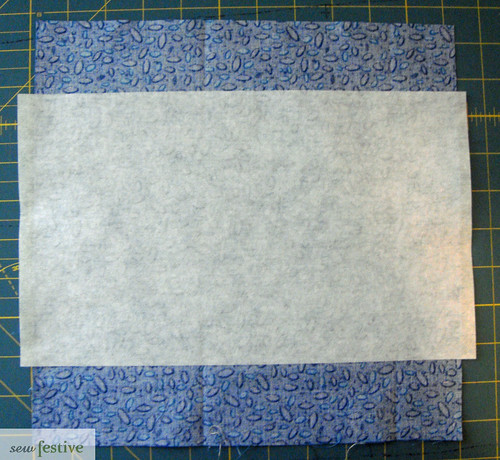
5. Fuse 7.5" square of interfacing to the back of the patchwork square, smoothing to decrease bubbling. Make sure you read the instructions that come with the type of interfacing you are using.


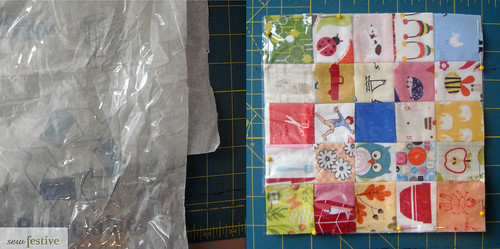
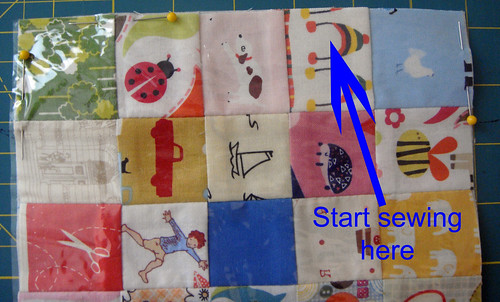
6. Pin the square of clear vinyl to the top of the patchwork square [just peel the paper off the backing of the vinyl before use]. The pins will leave permanent holes in the vinyl, so pin within the 1/4" seam allowance. Leave one section open so you can start sewing.


7. Set your needle at 1/8" and sew completely around the square, securing the vinyl to the patchwork. Note: this will really dull your needle, so feel free to do this with an older needle! Sew slowly because the vinyl is slippery. Make sure you are smoothing after each side you sew to accommodate any shifting that may have occurred.


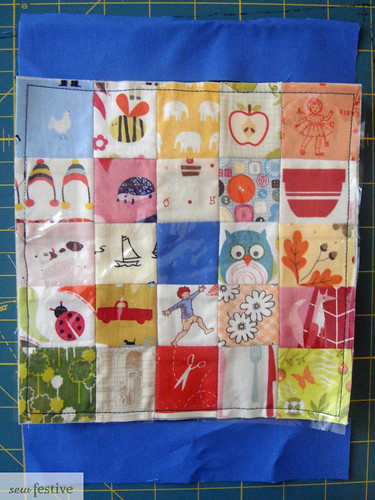
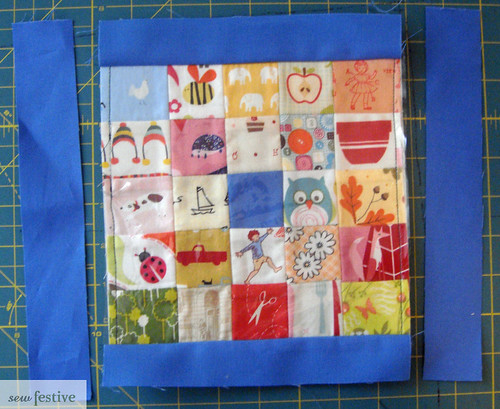
8. Sew the 1.5"x7.5" solid strips to the top and bottom of the square. I pinned the strips at the top and bottom of each side, within the seam allowance, to secure them, but there is much less shifting with the fabric on top of the vinyl. Sew strips with a 1/4" seam allowance. Press seams out toward the edges. IMPORTANT: The vinyl WILL melt if you place an iron on it, so press from the BACK of the square, using a synthetic setting on your iron. Then press from the front, making sure that the iron is only touching the solid strips that you just added.


9. Sew the other set of solid strips to the sides of the square. Repeat same pressing process as outlined above.


10. Fuse 11" square of interfacing to the backing fabric. I didn't have a big enough piece of interfacing, but don't be like me!


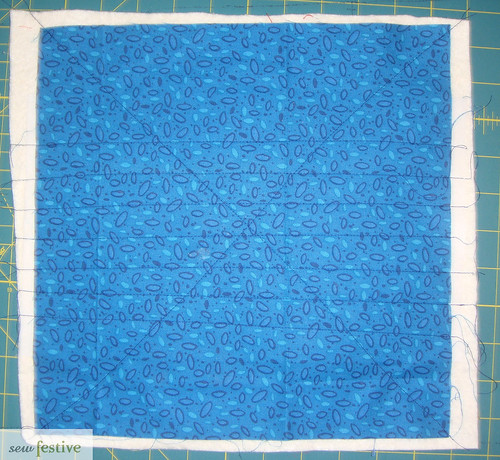
11. Place backing on batting. Quilt as desired. You will be quilting just through the backing and batting. [I just eyeballed my quilting lines; this step is for extra stiffness and stability in the finished product]


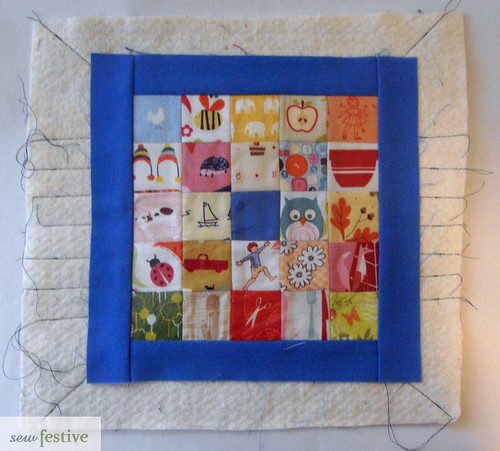
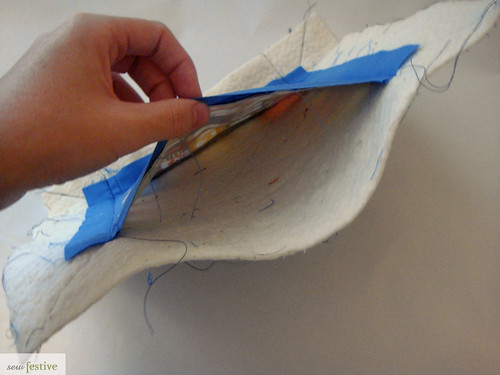
12. Place top on batting and baste as desired. If you pin baste remember to not pin in the vinyl section.


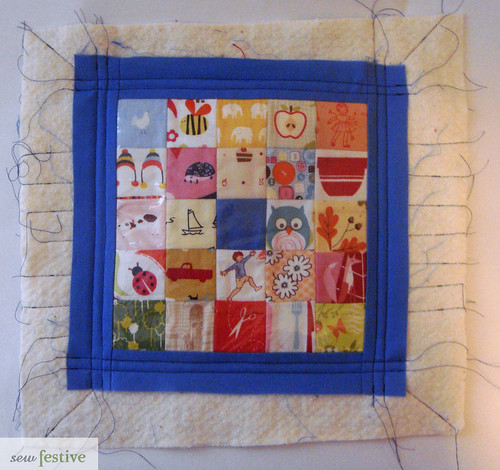
13. Quilt in border section. Trim batting flush with border pieces.


*Note: After I had quilted around 3 sides I realized that I could slide some template plastic or cardboard into the "pocket" before quilting the 4th side in order to make it even stiffer [this is only possible because we're quilting the top and the backing separate]. I didn't have either of those items, but feel free if you do. If you do that then just cut the insert about 7 1/8" square and pop it in. Then quilt the 4th side!


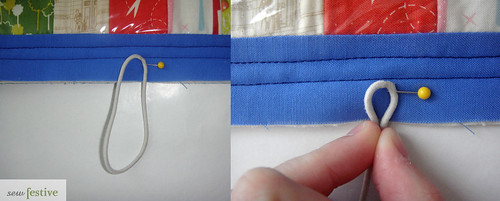
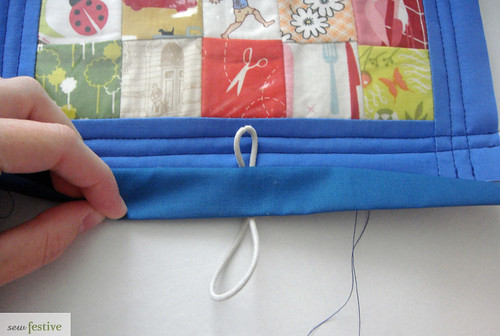
14. Take scrap piece of batting or hair tie and pin at the bottom center of the front of the bingo card [where the vinyl is]. Pin in place with ends sticking out into the seam allowance. Pinch together if necessary so the ends are together when you sew over them. There should be just about 1" making up the loop. If you plan to use a smaller marker, take that into account when sewing down the elastic.


15. Sew binding to front of bingo card, backstitching several times over the section with the elastic. Trim elastic so you can fold the binding over.

16. Sew binding to the back of the bingo card using preferred method.

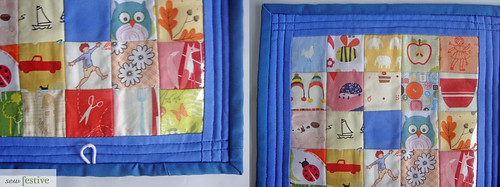
Voila! You have a reusable travel bingo card! Use a dry erase marker to mark off the squares [and the elastic provides a convenient place to store the marker!] and it wipes right off for the next time you want to play, no water or cloth necessary!

"Well, Rebecca, what do I do with this bingo card?"

Ideas for playing:
  • Let your kids help pick out the fabric for their own card. Fun!
  • It might also be a good idea to go over the card with them the first time if they're young, so that they know what the illustration in each square is supposed to be.
  • You can play it I-Spy style in the car or at a destination; when you see something on your card you cross it off and first person to fill a row/column/diagonal wins.
  • You can play more traditional bingo style and either write down on paper what's on the cards and draw out of a hat, or you can cut an extra square out of the fabric as you're making it and draw that out of a hat to call out the "numbers". 

"But Rebecca, what if I don't want to subject my kids to a terrible selection of novelty prints like your card [seriously, where can I find scissors and cake and elephants at the same place?] because I also don't have many novelty prints?"

Ideas for overcoming a lack of novelty prints:
  • Use solids! You can play in the same way by trying to find the colors in your surroundings and marking them off or by cutting out extra solid squares and calling the colors out in a traditional bingo style. 
  • Use a 7.5" white fabric square and draw or sew a grid on it and let your kids draw their own pictures in each square! Then carry on with the tutorial in the same way.

I hope you consider making some of these! Please let me know if you have any questions :)

And check out some of the other tutorials [Jenelle, Julie, and Marti] from this week on the blog hop!